
Devices
See and add the desk phones and DECT handsets on your phone system, change several at once, import a list, and check what each phone has downloaded.
Devices lists the desk phones and cordless handsets set up on your phone system. Each phone downloads its settings from VoxaLink when it starts, so a new phone needs no setup on the handset itself. You add it here, give it an extension, and plug it in.
You find it in the menu under Admin, then Devices.
Three short terms come up on this page:
- MAC address is the phone's hardware ID, 12 letters and numbers such as 80:5E:C0:12:34:99. It is printed on a label under the phone.
- IPEI is the same idea for a cordless DECT handset. It is 10 letters and numbers, shown under the battery or in the handset's settings menu.
- RPS is the phone maker's cloud set-up service. A phone registered with it finds VoxaLink by itself the first time it connects to the internet.
The tabs
The page has two tabs at the top, each with a count.
- MAC lists desk phones and DECT base stations.
- IPEI lists cordless DECT handsets. See DECT handsets.
Click a phone's MAC address in the list and a third tab opens, labelled with that MAC address. It holds the phone's download history and a few tools. See A phone's own tab.
The list
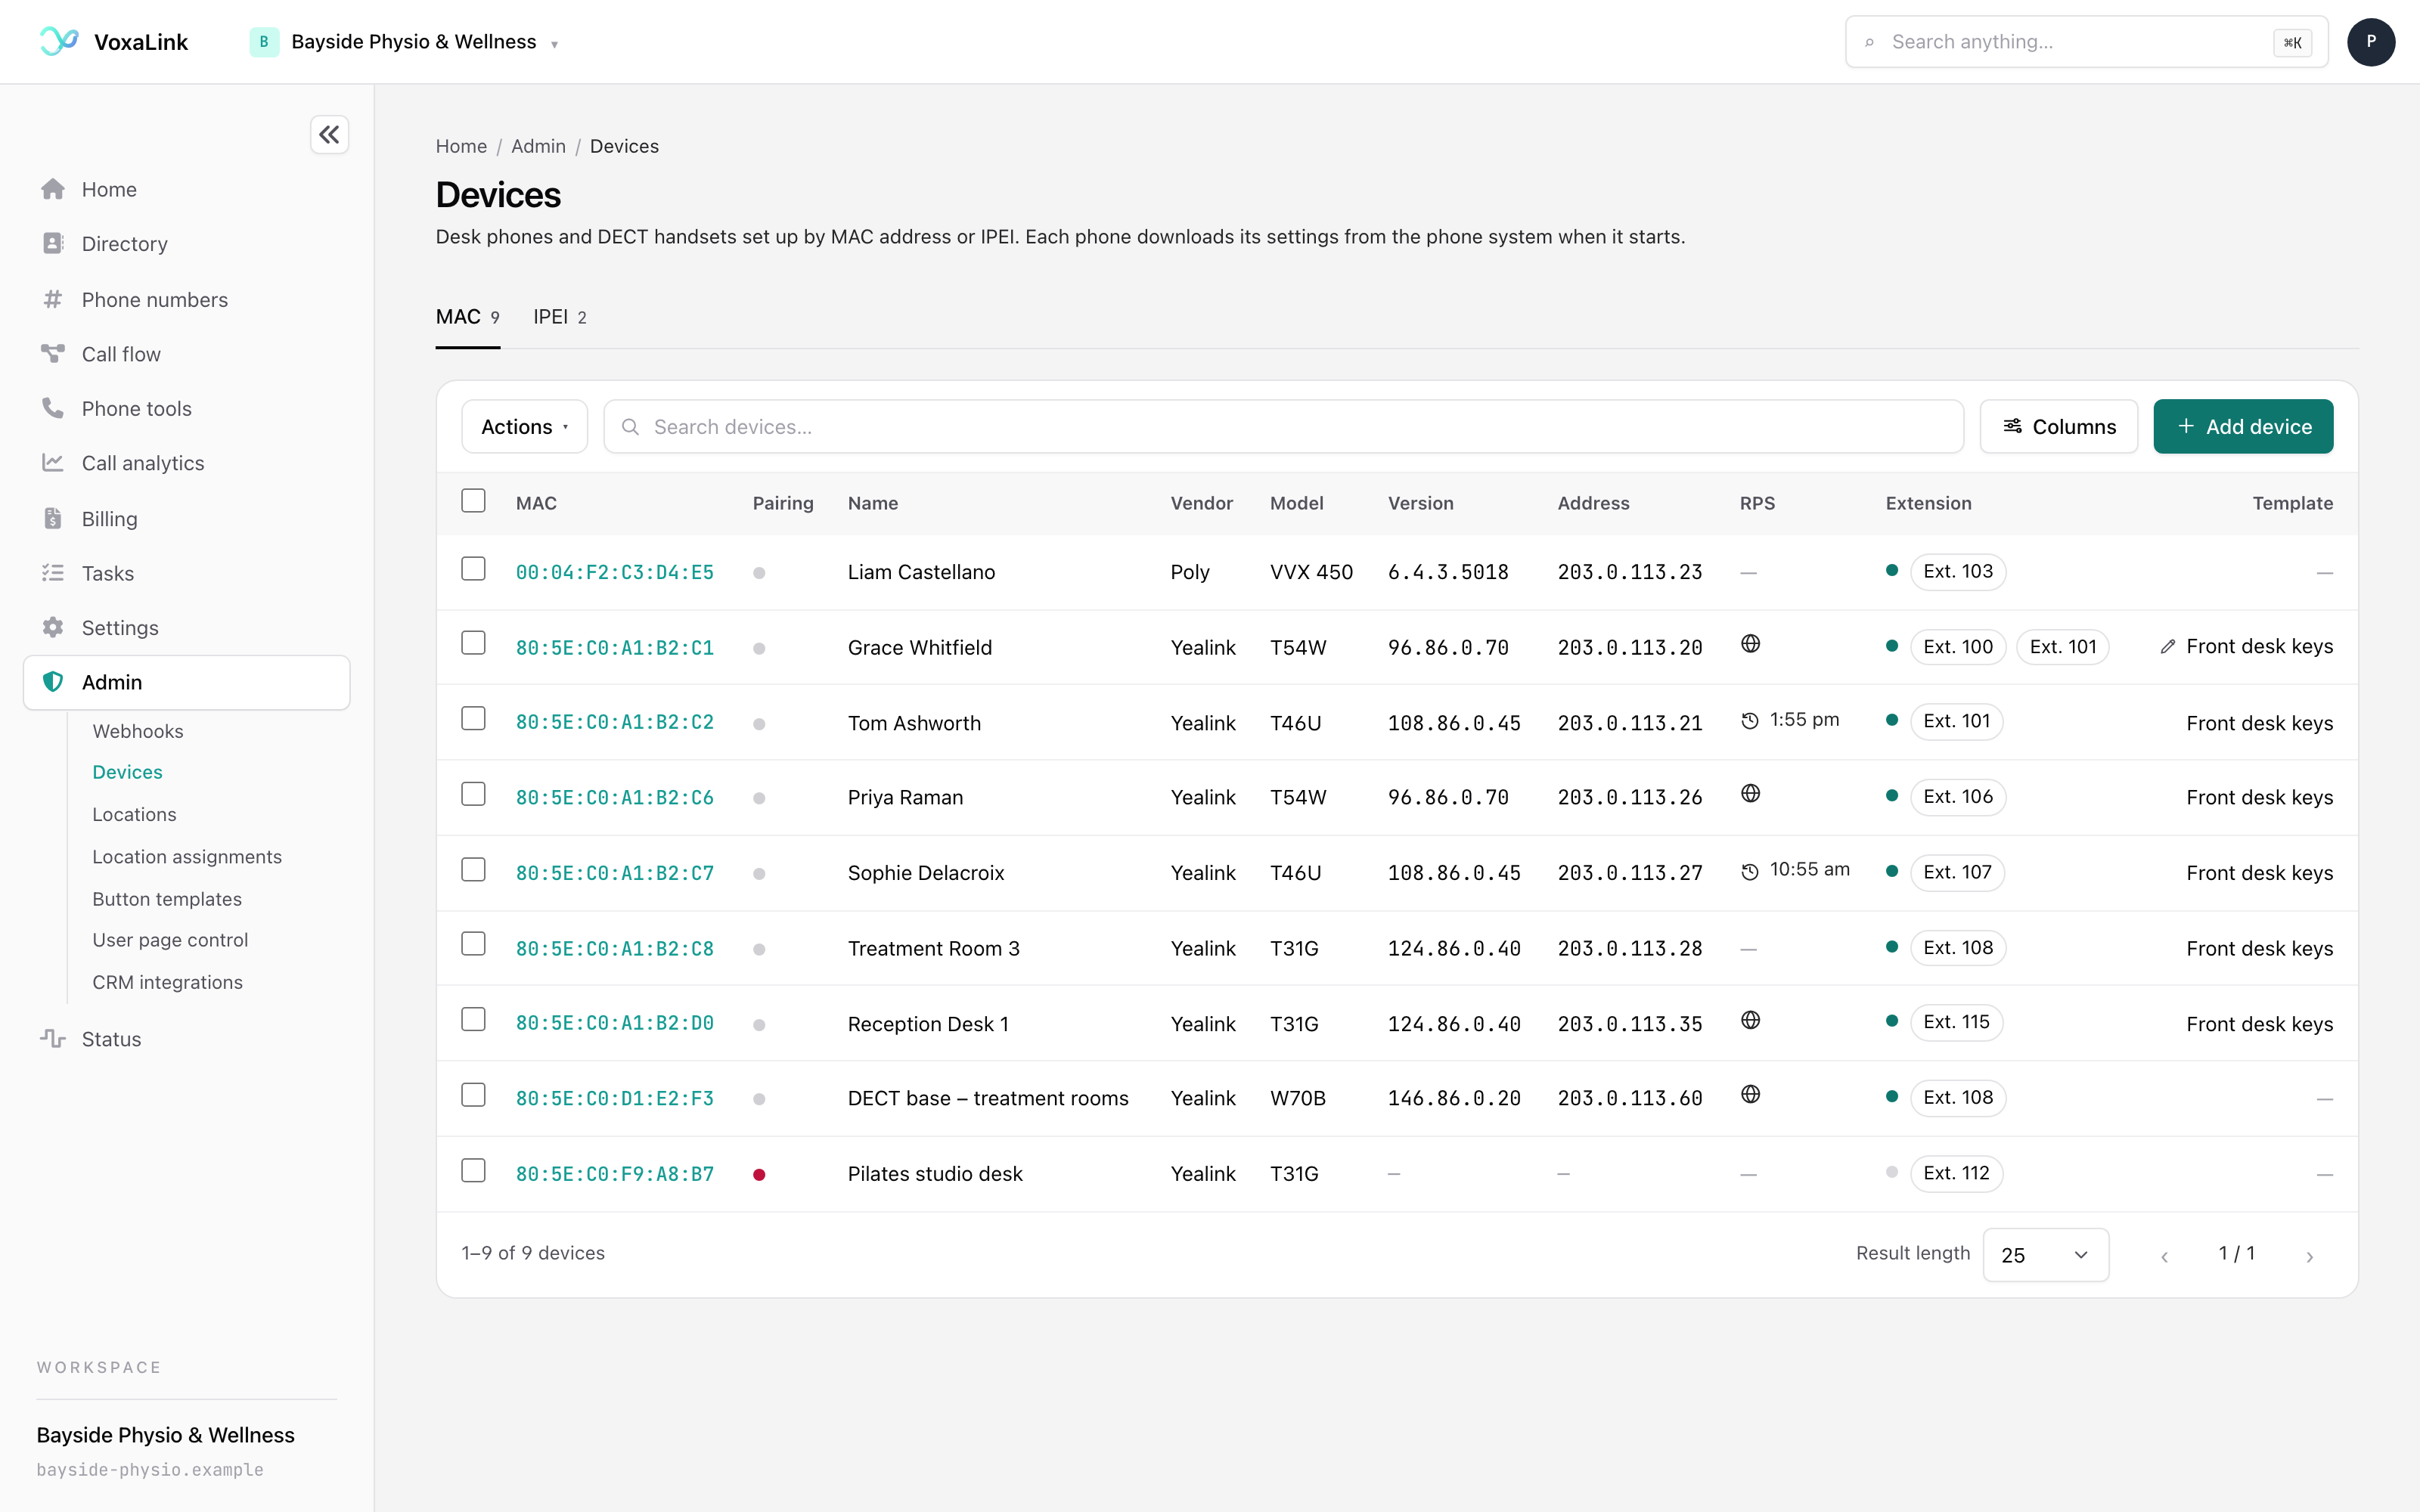
Above the table, from left to right:
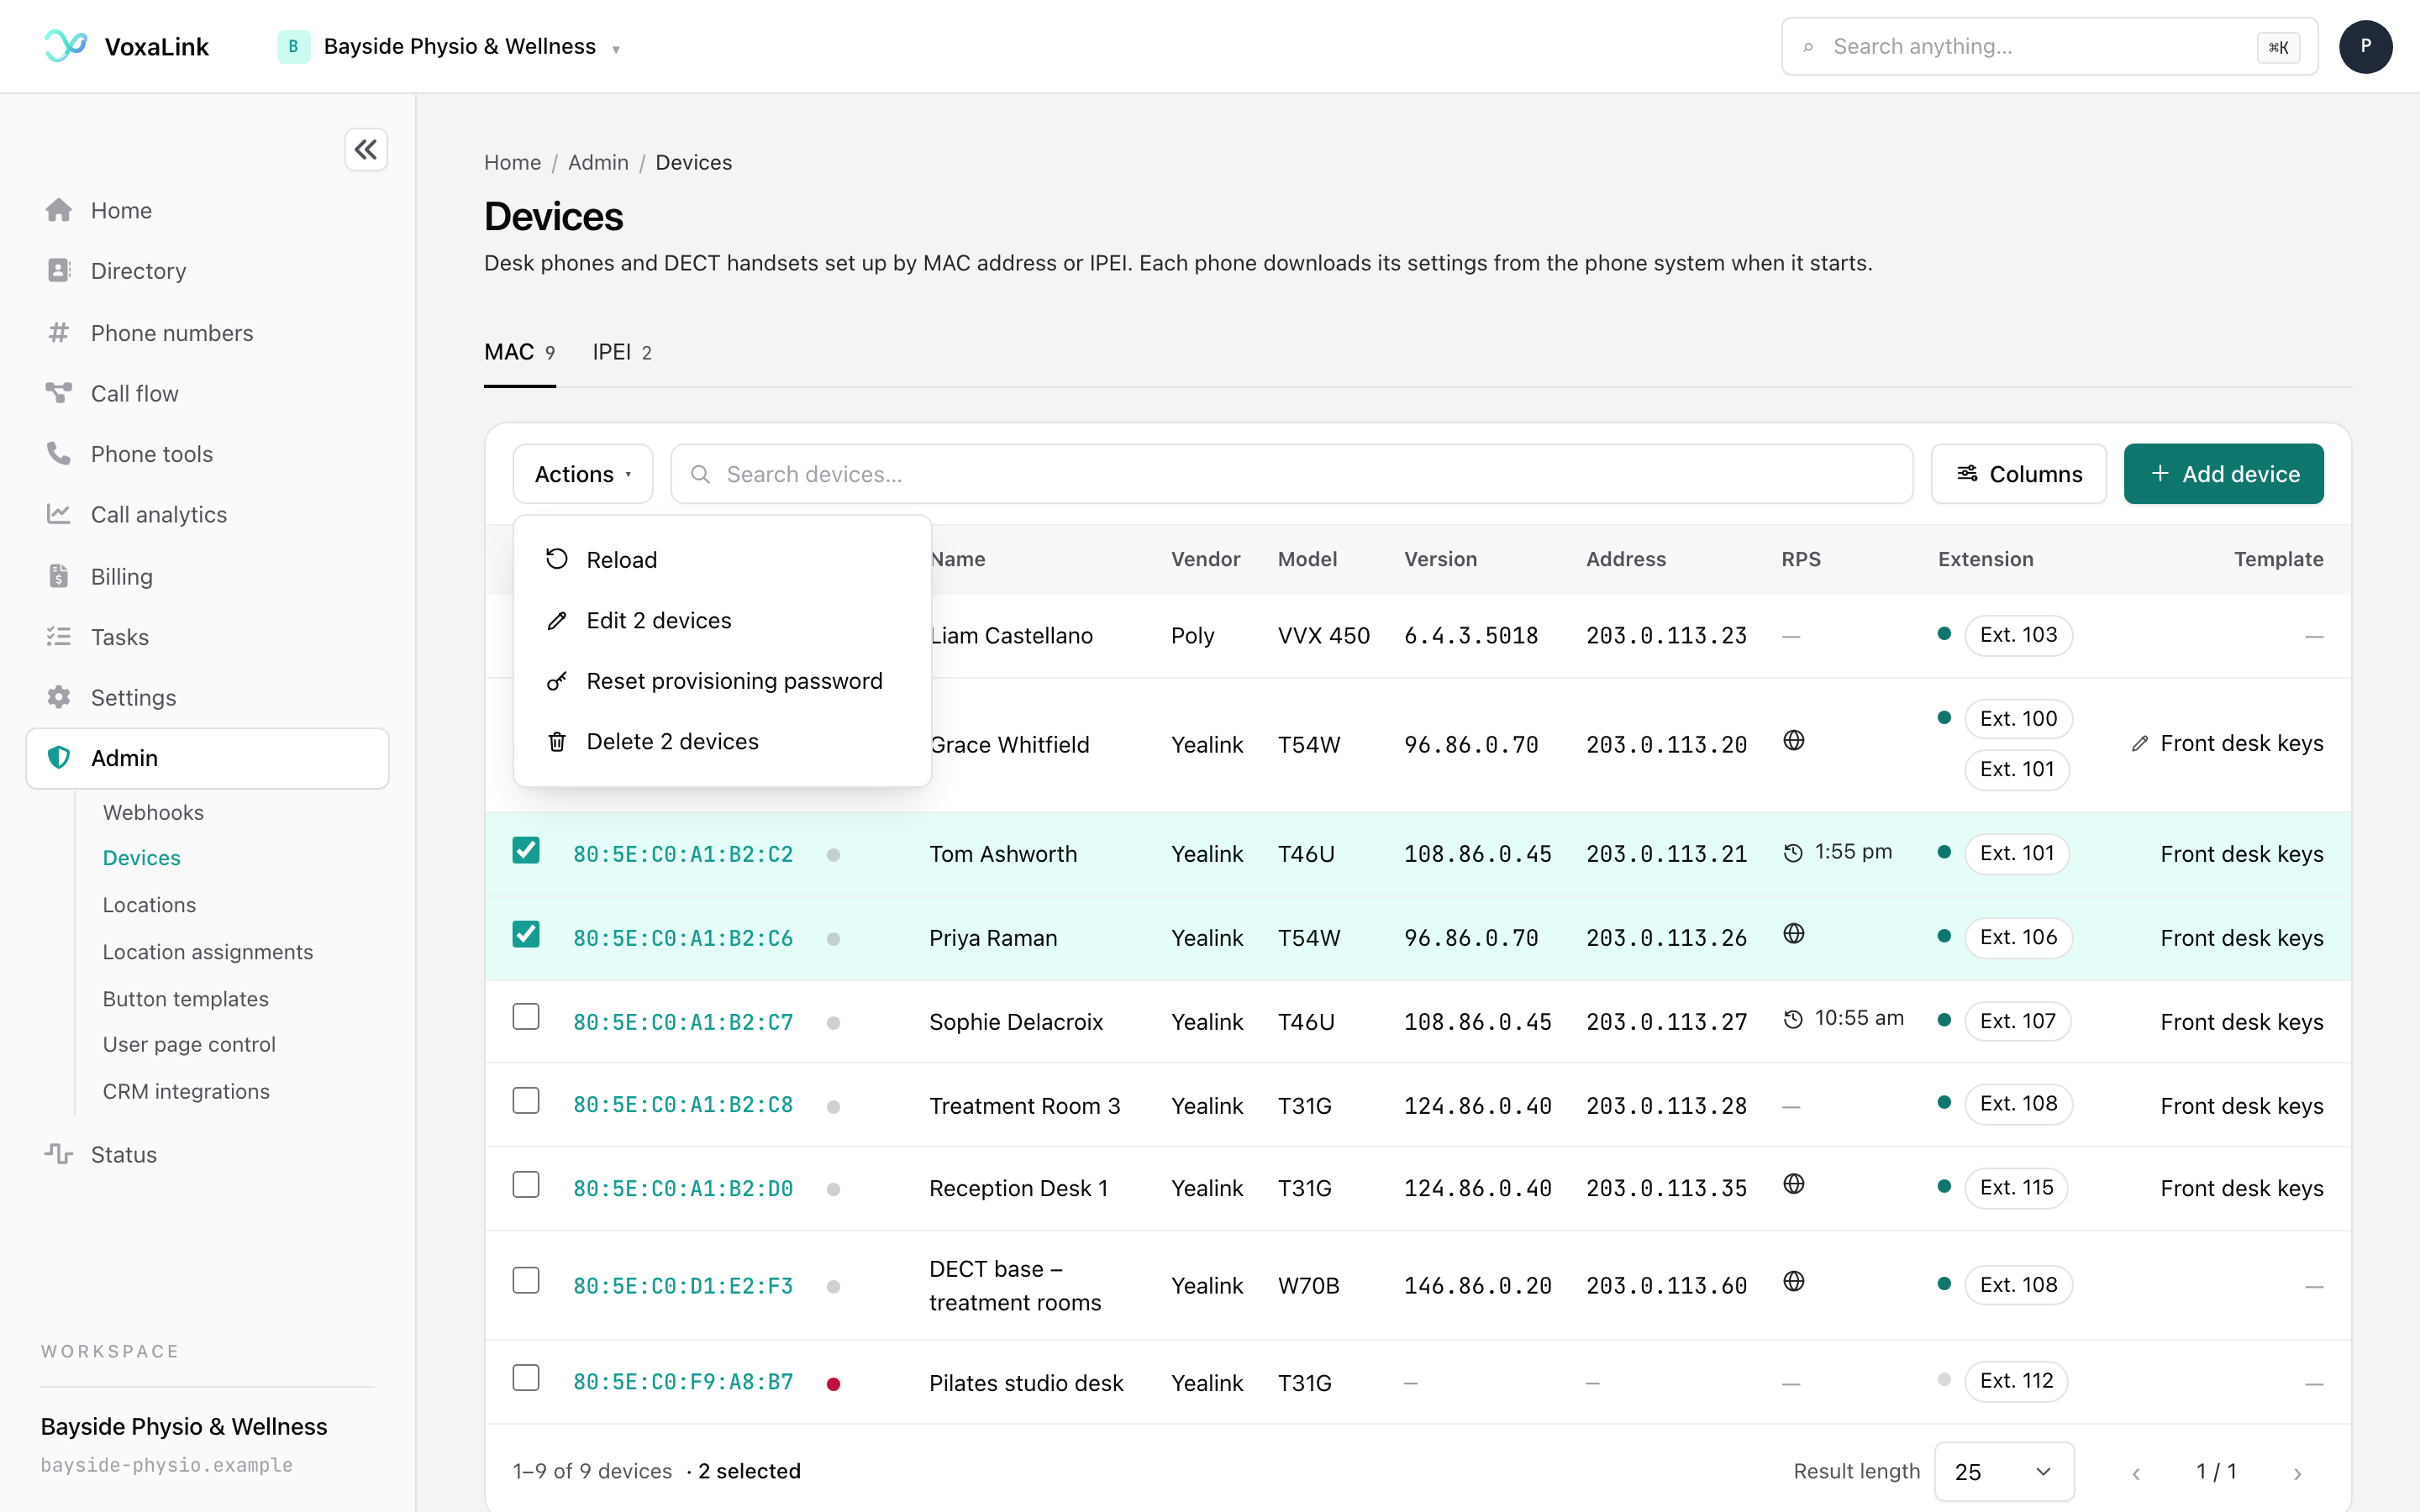
- Actions opens a menu with Reload, Edit, Reset provisioning password and Delete. Tick one or more phones first. Edit, Reset and Delete stay greyed out until you do. With several ticked, the menu reads Edit 3 devices or Delete 3 devices.
- Search devices… narrows the list as you type. It matches the MAC address, name, vendor, model, template, version and extension. Type
extension=101to see only the phones on extension 101. Typeregistered=trueto see phones that are online, orregistered=falsefor phones that are not. - Columns chooses which columns to show. Your choice is remembered in that browser.
- Add device opens the add form.
Reset provisioning password gives each ticked phone a new password the next time it downloads its settings. Delete stops the phones getting settings from VoxaLink. It does not delete their extensions. Both ask you to confirm first.
Below the table, Result length sets how many phones show per page, and the arrows move between pages.
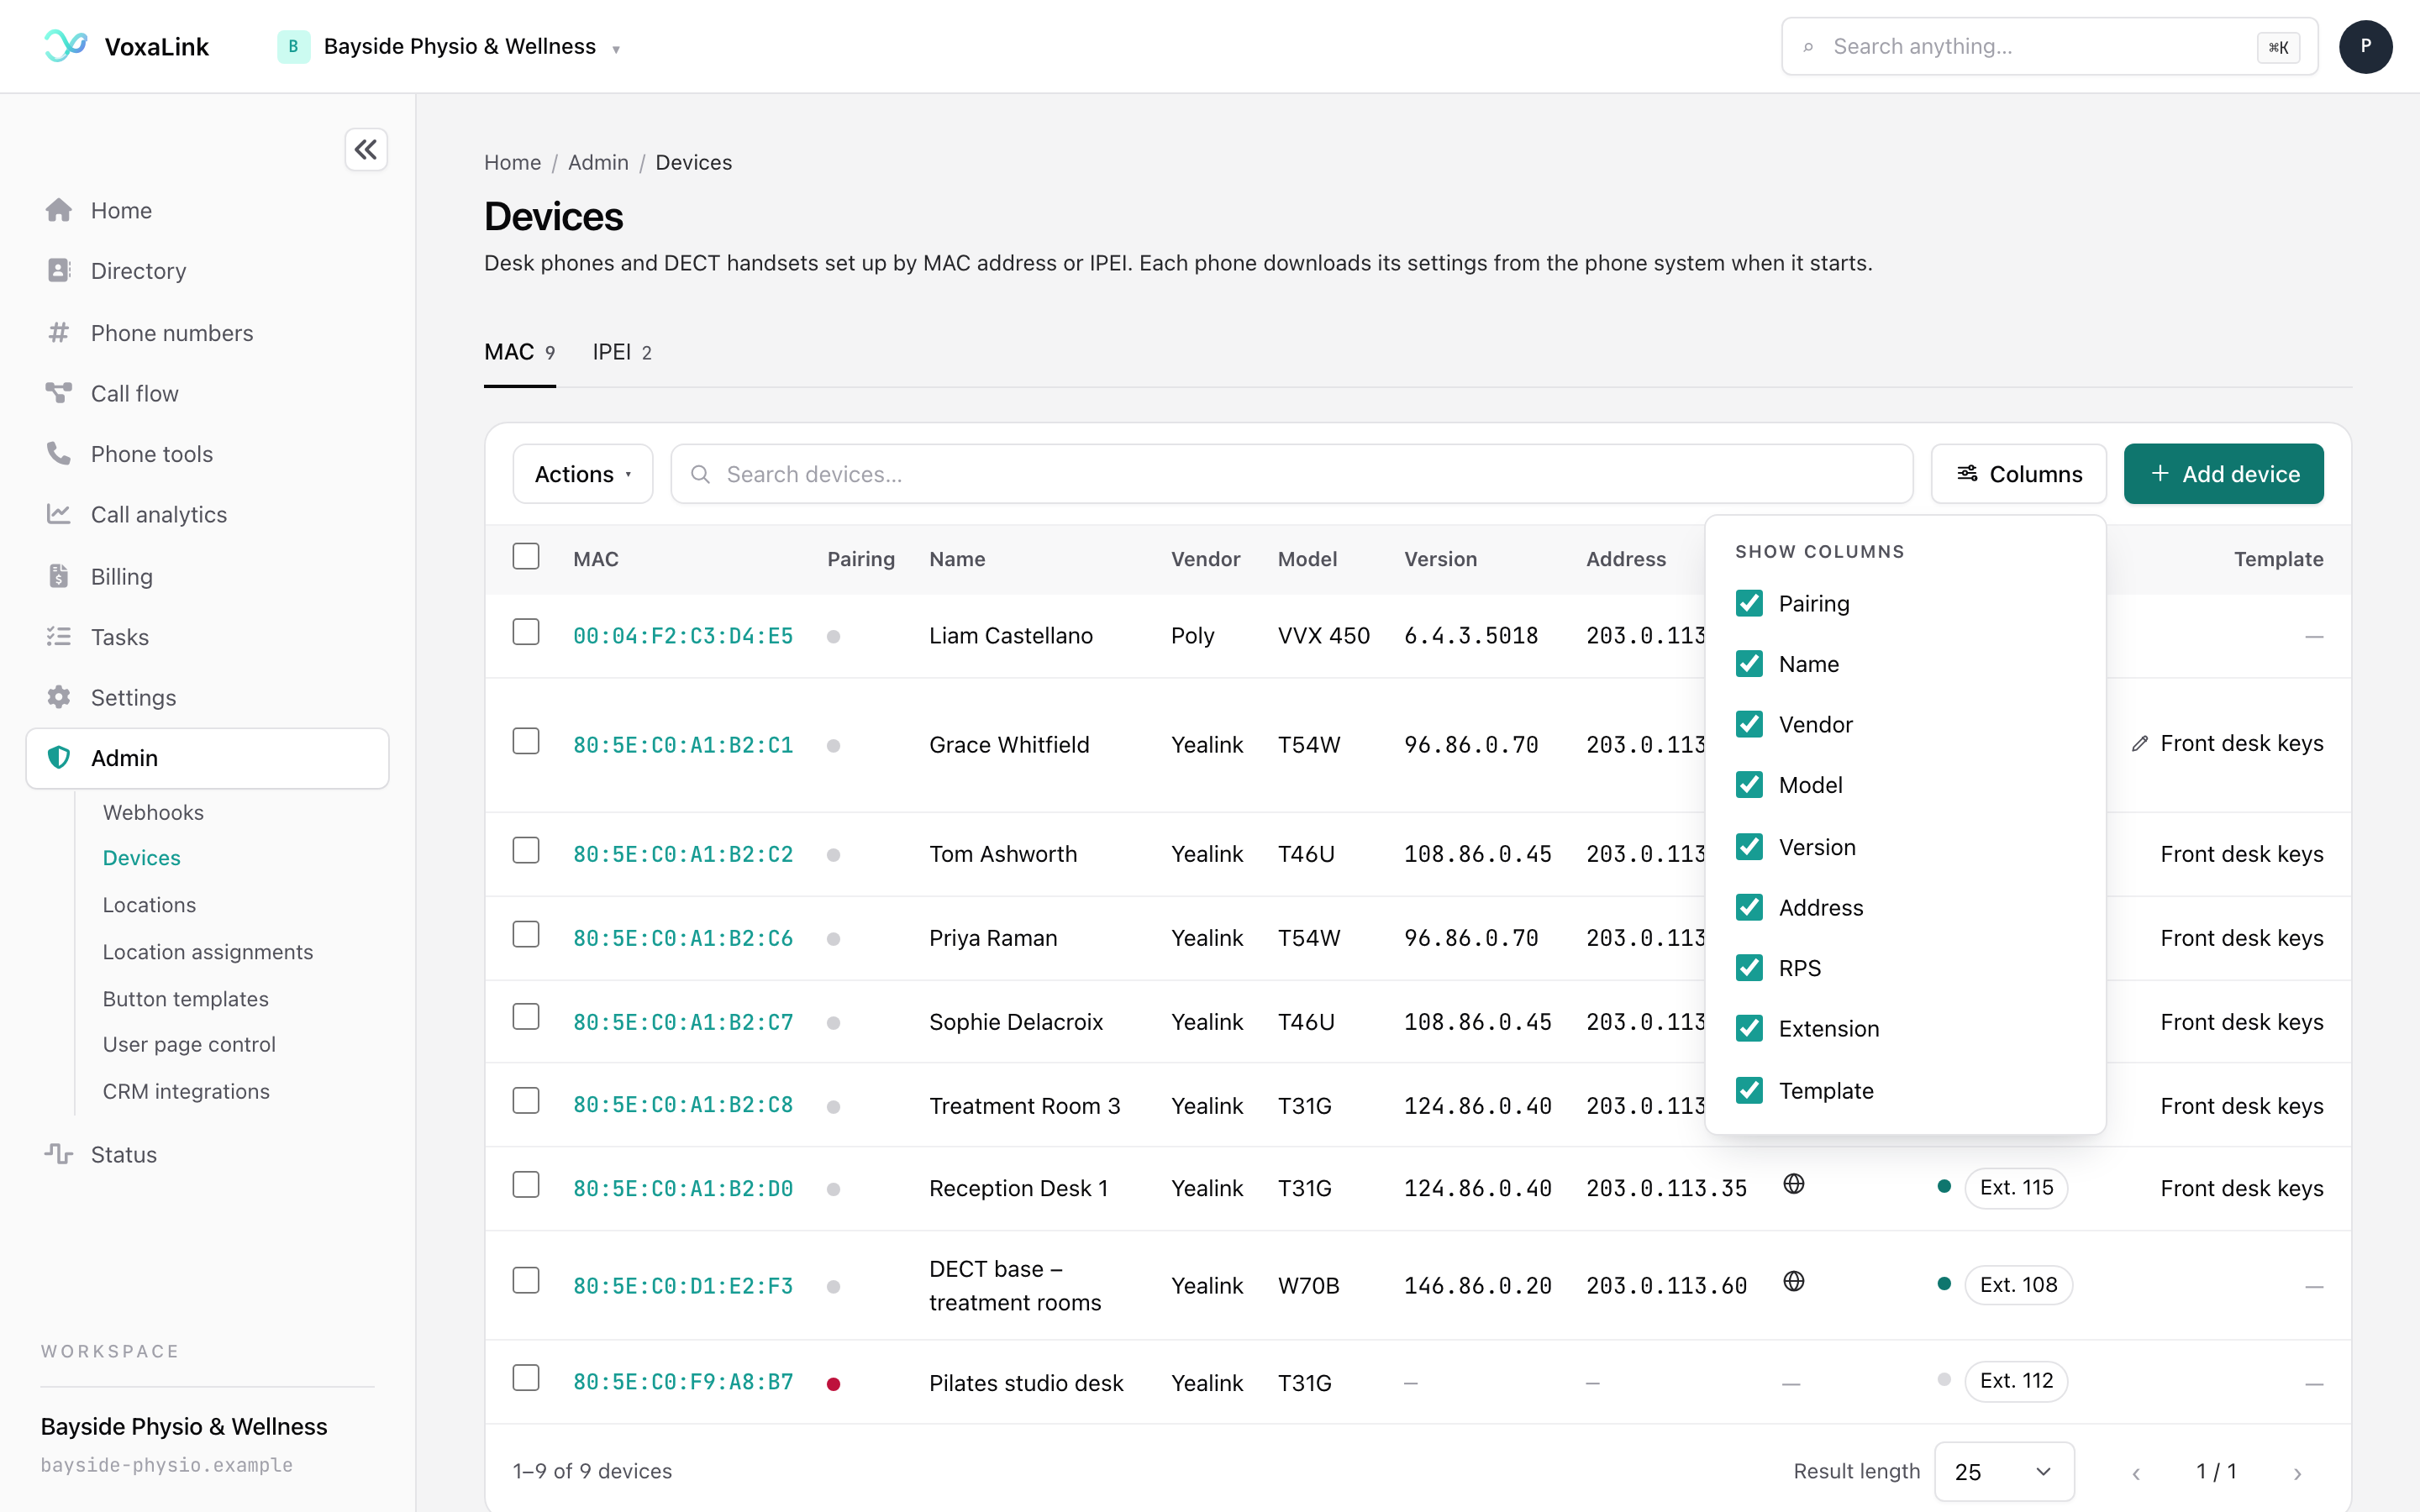
Each column shows:
- MAC: the phone's address. Always shown. Click it to open the phone's own tab.
- Pairing: a red dot means the phone is waiting to pair. It has not picked up its settings yet.
- Name, Vendor, Model and Version: what you entered, plus the software version the phone reports.
- Address: the network address the phone last fetched its settings from.
- RPS: a globe means the phone is registered with the phone maker's cloud set-up service. A clock with a time or date shows when it last synced with that service. A dash means it is not set up there.
- Extension: a chip such as Ext. 100 for each extension on the phone. Click a chip to open that person. A green dot means the phone is online. A grey dot means it is offline or not set up yet.
- Template: the name of the button template the phone uses. A small pencil means the phone has its own button layout. To build shared layouts, see Button templates.
Add a desk phone
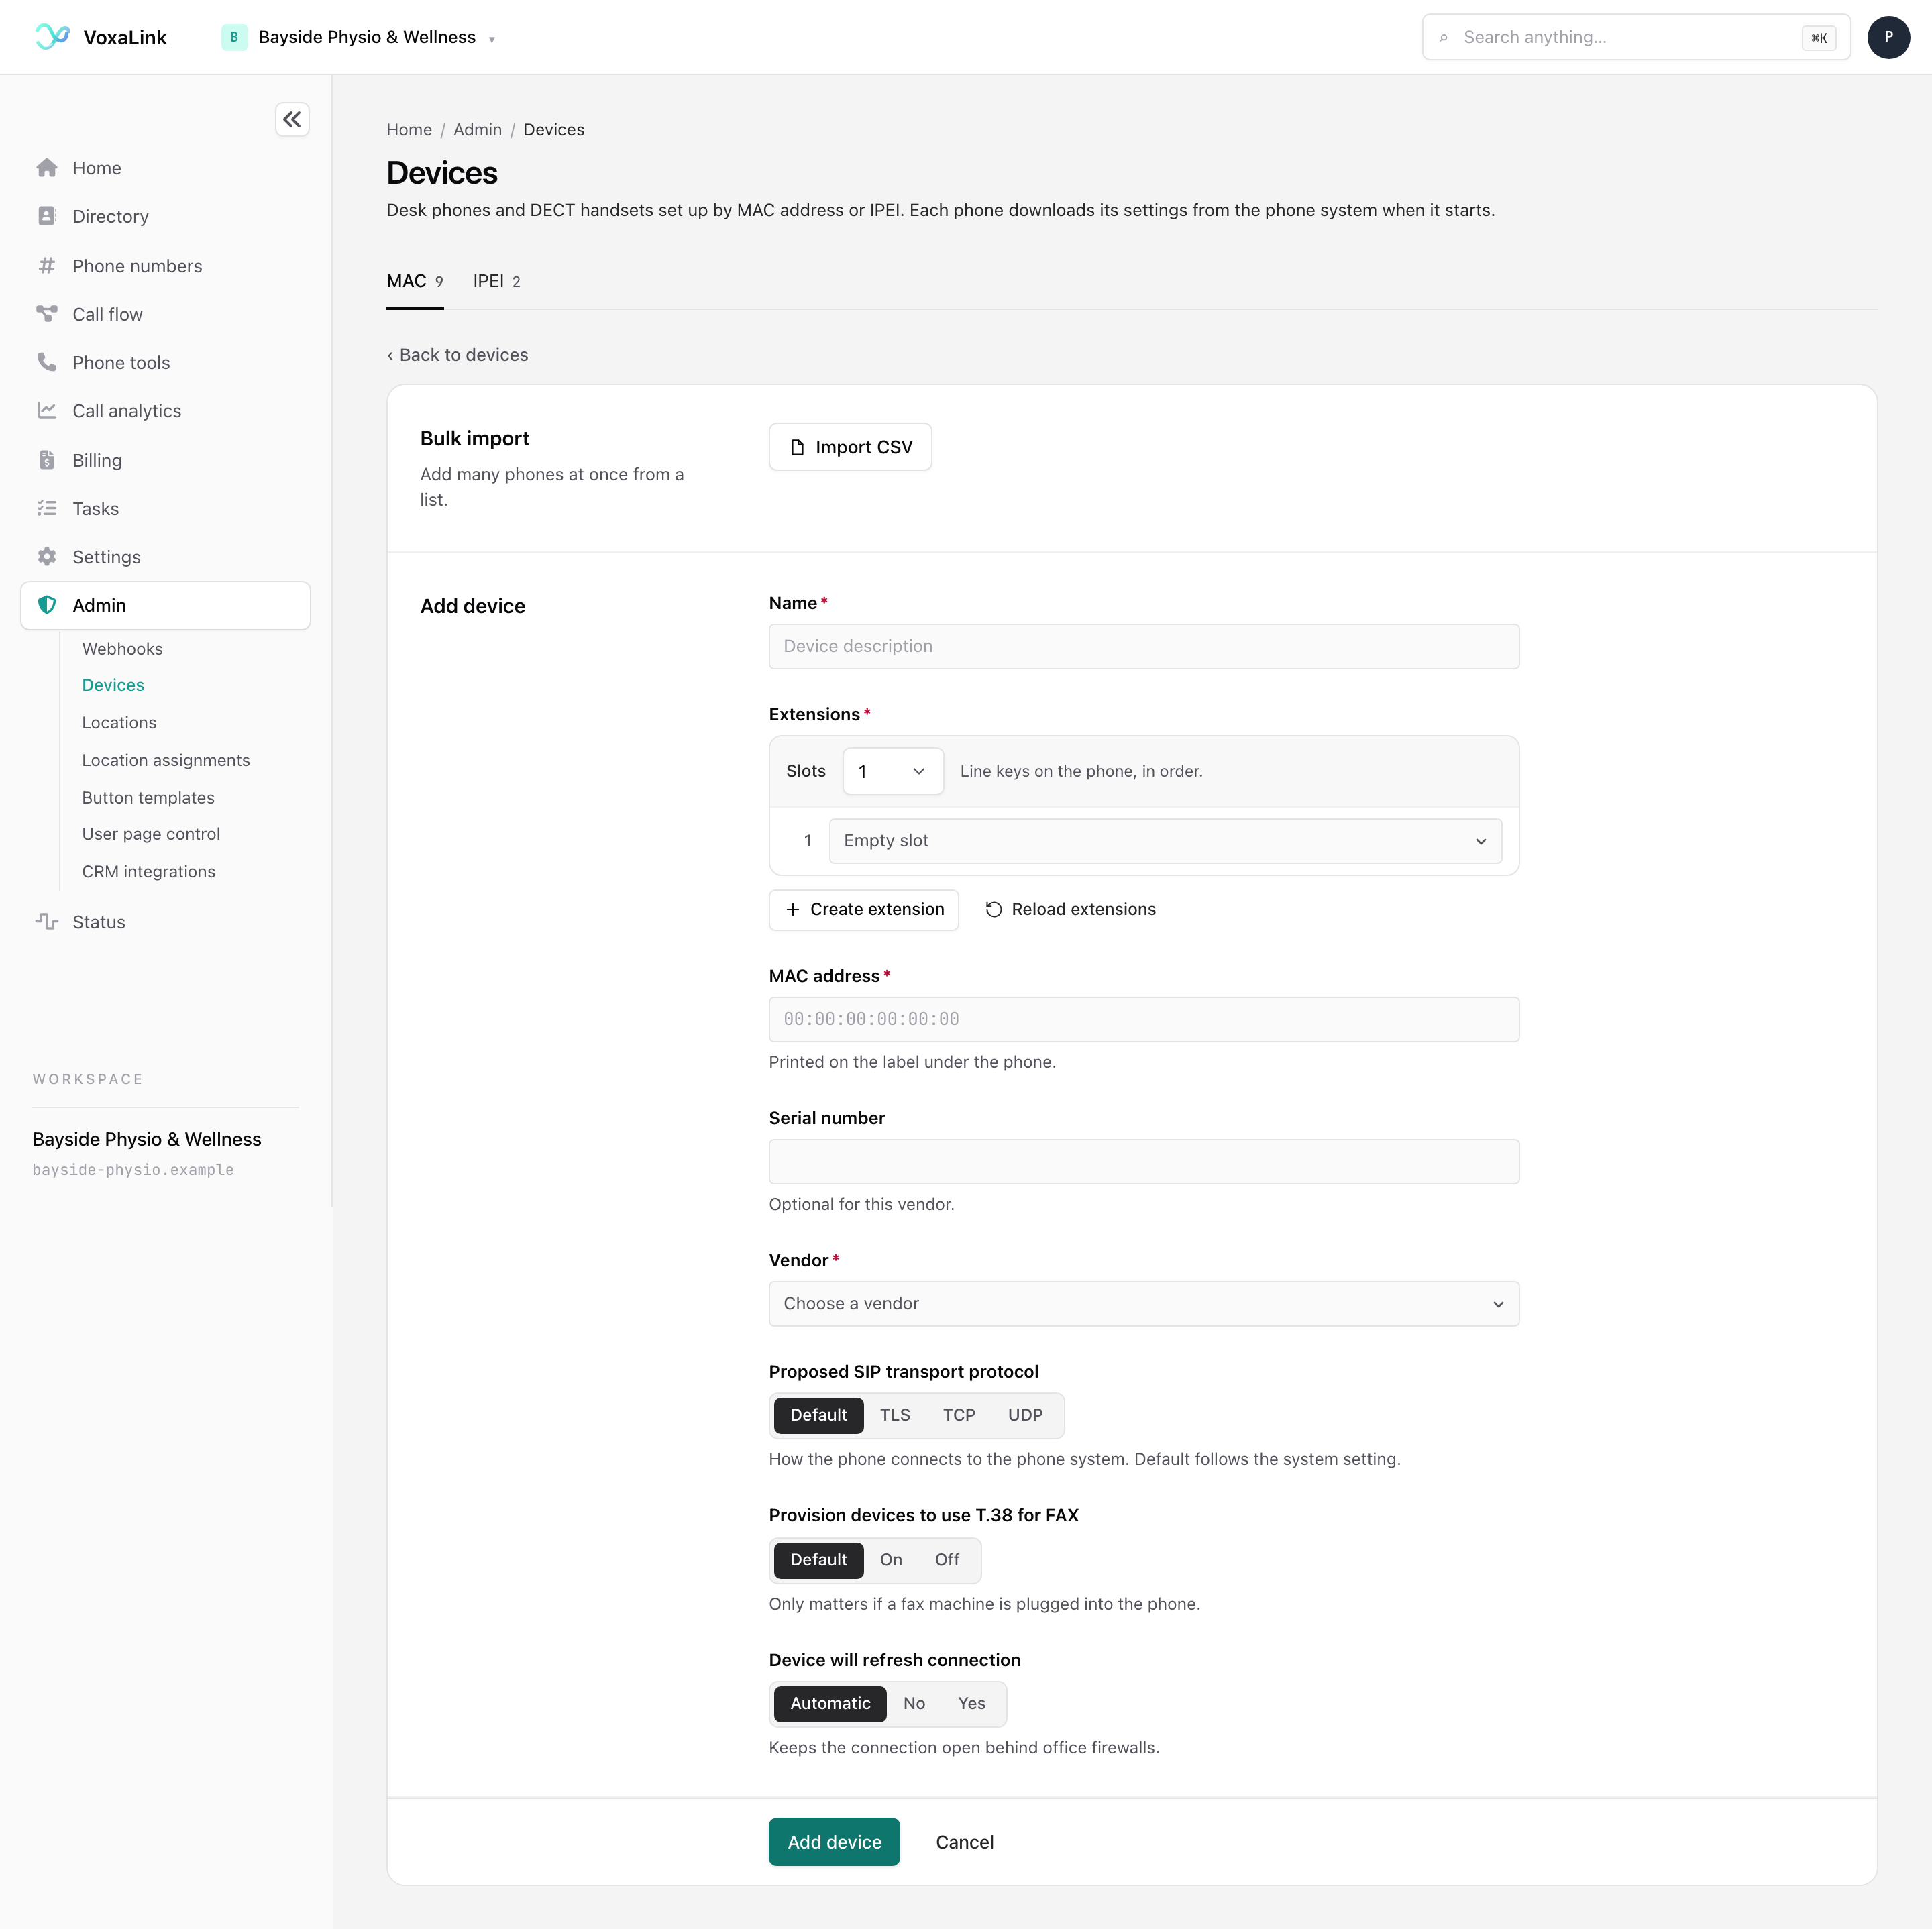
- Click Add device.
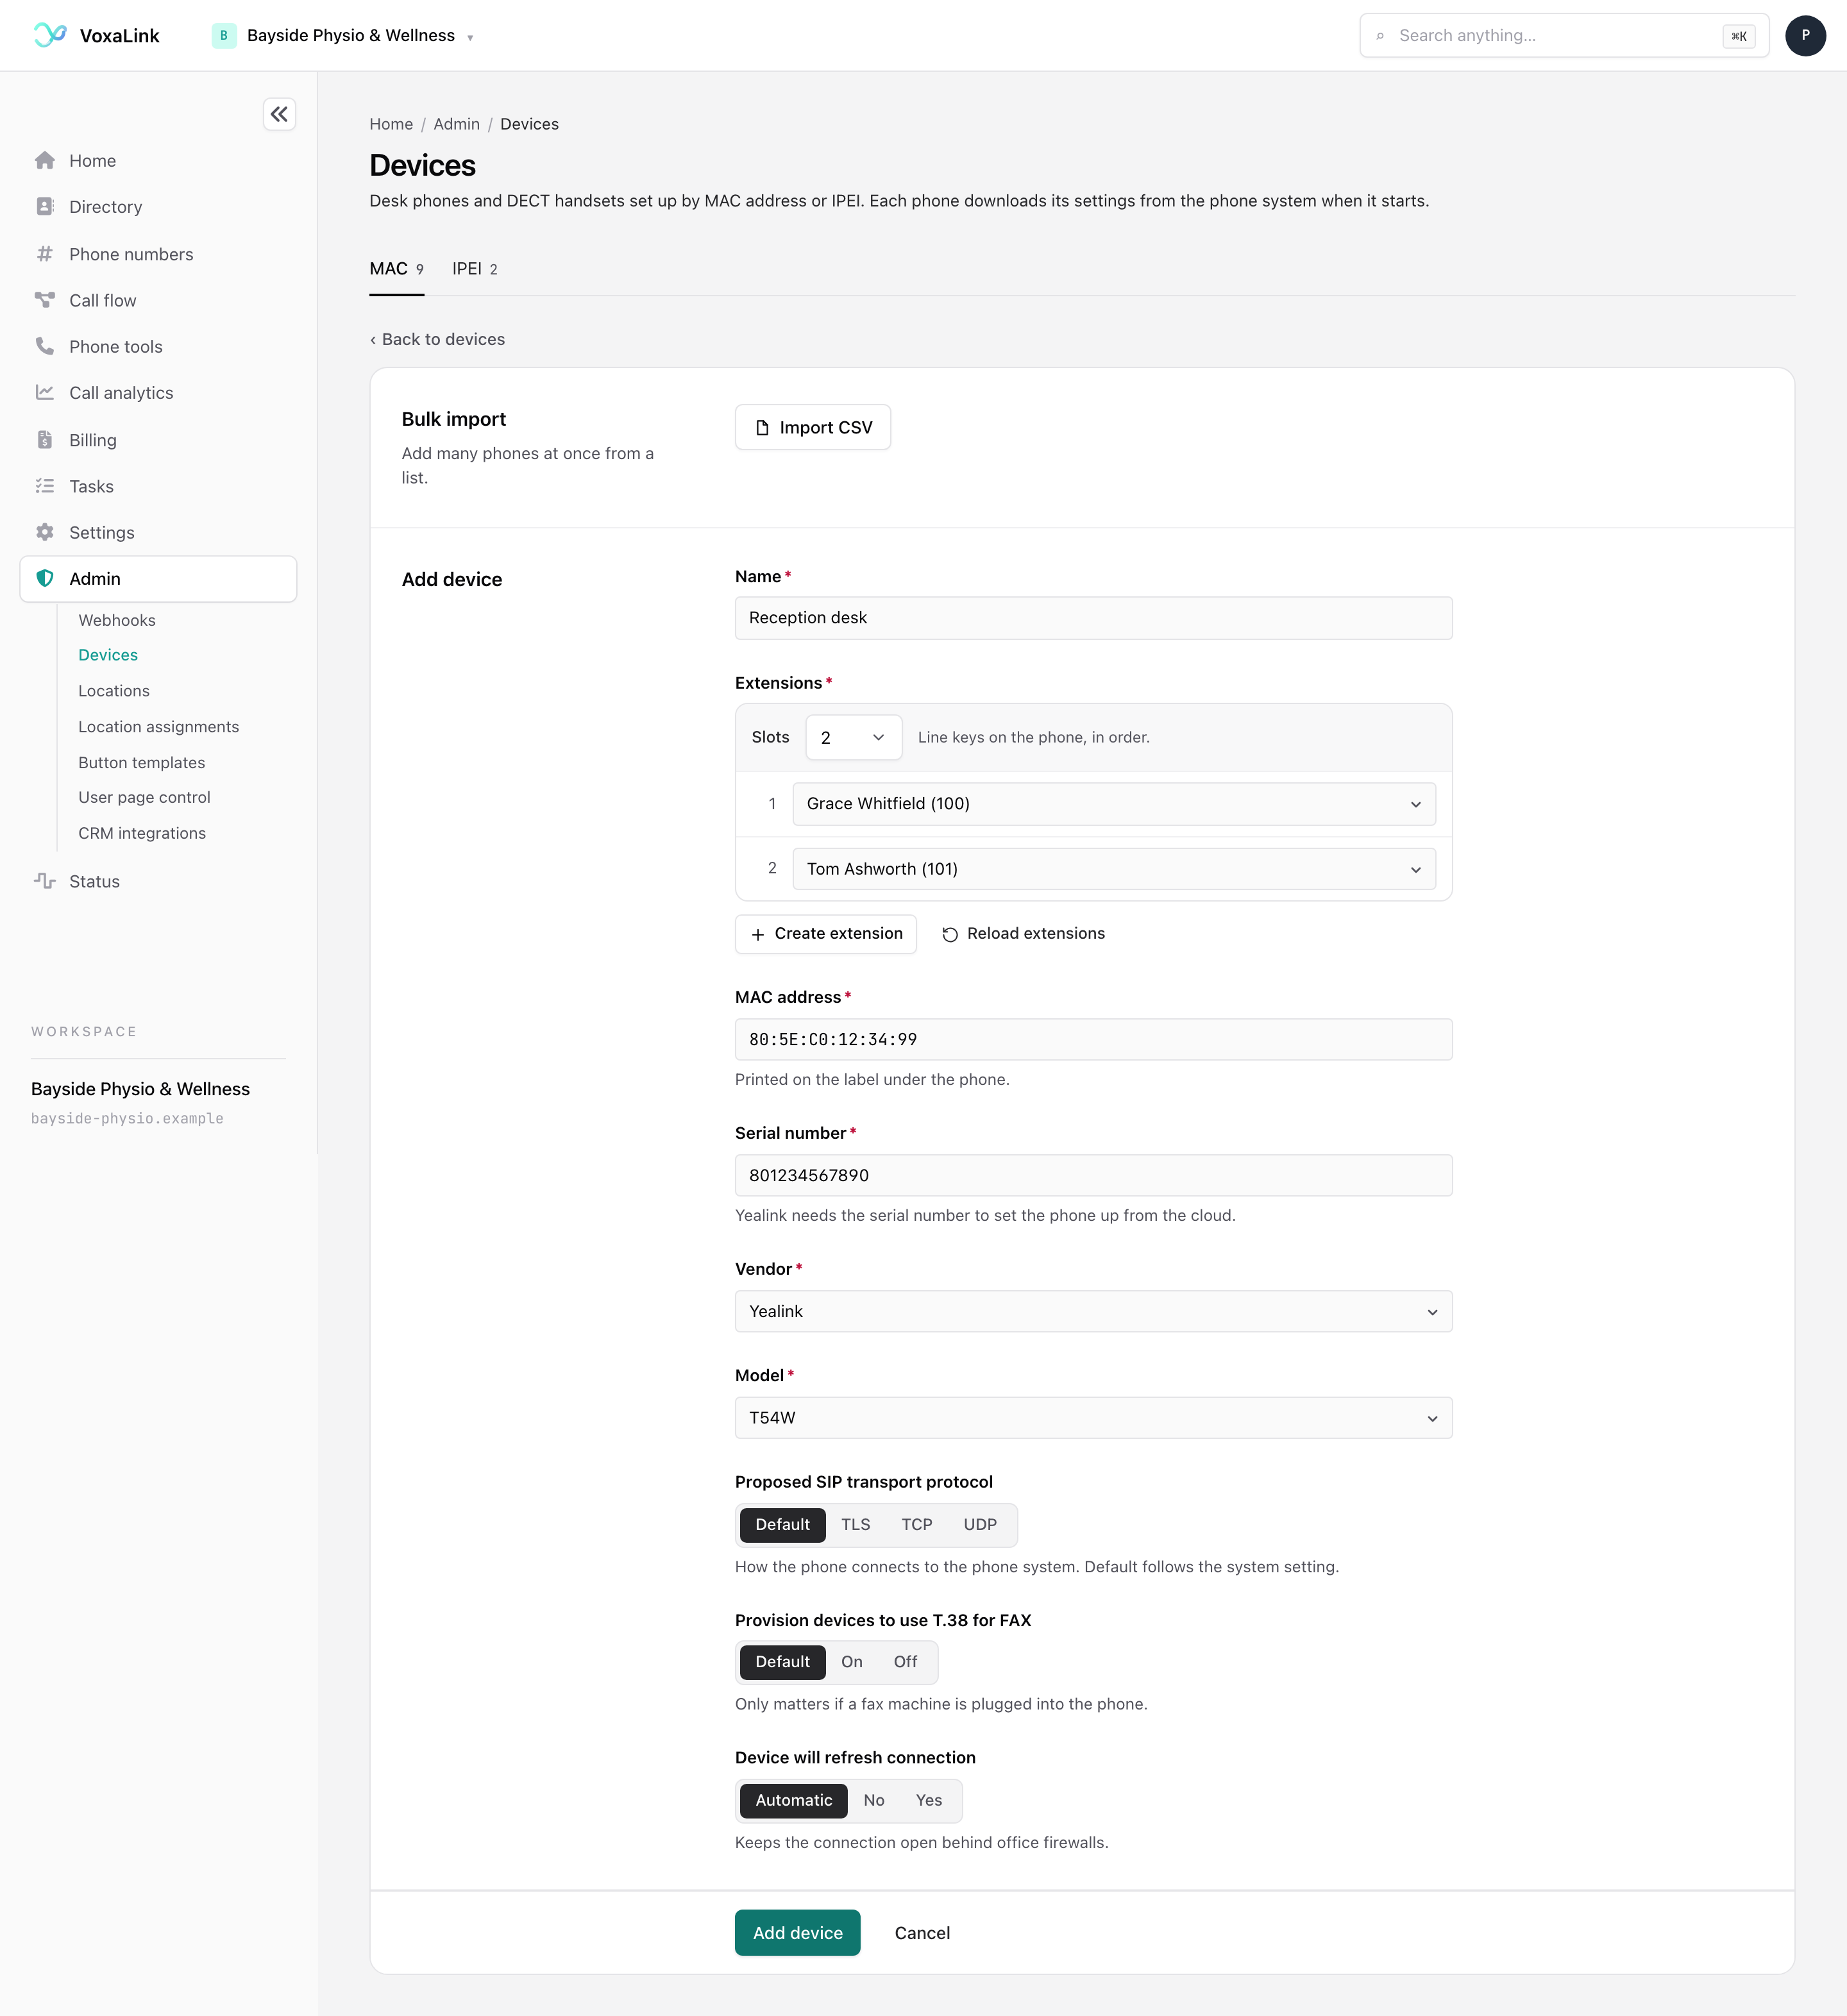
- Under Extensions, set Slots to the number of line keys that need an extension. Then pick an extension for each slot. A slot can stay on Empty slot, but at least one slot needs an extension.
- Type the MAC address. VoxaLink fills in the Vendor for you.
- Choose the Model.
- Enter the Serial number. Yealink phones need it. It is optional for Snom.
- Check the Name. If you picked one extension and have not typed a name, VoxaLink fills in the extension number for you, for example "Extension 100". Replace it with something clearer, such as "Reception desk".
- Click Add device. A green Device added. message appears above the list.
Plug the phone in. It downloads its settings and shows up as online in the list.
Notes on the form:
- Extensions are the phone's line keys, numbered 1 to 48 in the order they sit on the phone. Put two people on one phone by giving each a slot, as on the reception desk above.
- Create extension opens the new-person page in a new browser tab. When you come back, click Reload extensions to see the new person in the lists.
- Vendor is Yealink or Snom. Choosing a vendor changes the models offered.
- Proposed SIP transport protocol is how the phone connects to the phone system. Default follows the system setting. The other choices are TLS, TCP and UDP. Leave it on Default unless your installer tells you otherwise.
- Provision devices to use T.38 for FAX only matters if a fax machine is plugged into the phone. Default follows the Provisioning setting under Settings, then General. See Tenant default values. Choose On or Off to override it for this phone.
- Device will refresh connection keeps the connection open behind office firewalls. The choices are Automatic, No and Yes.
If the MAC address is already there
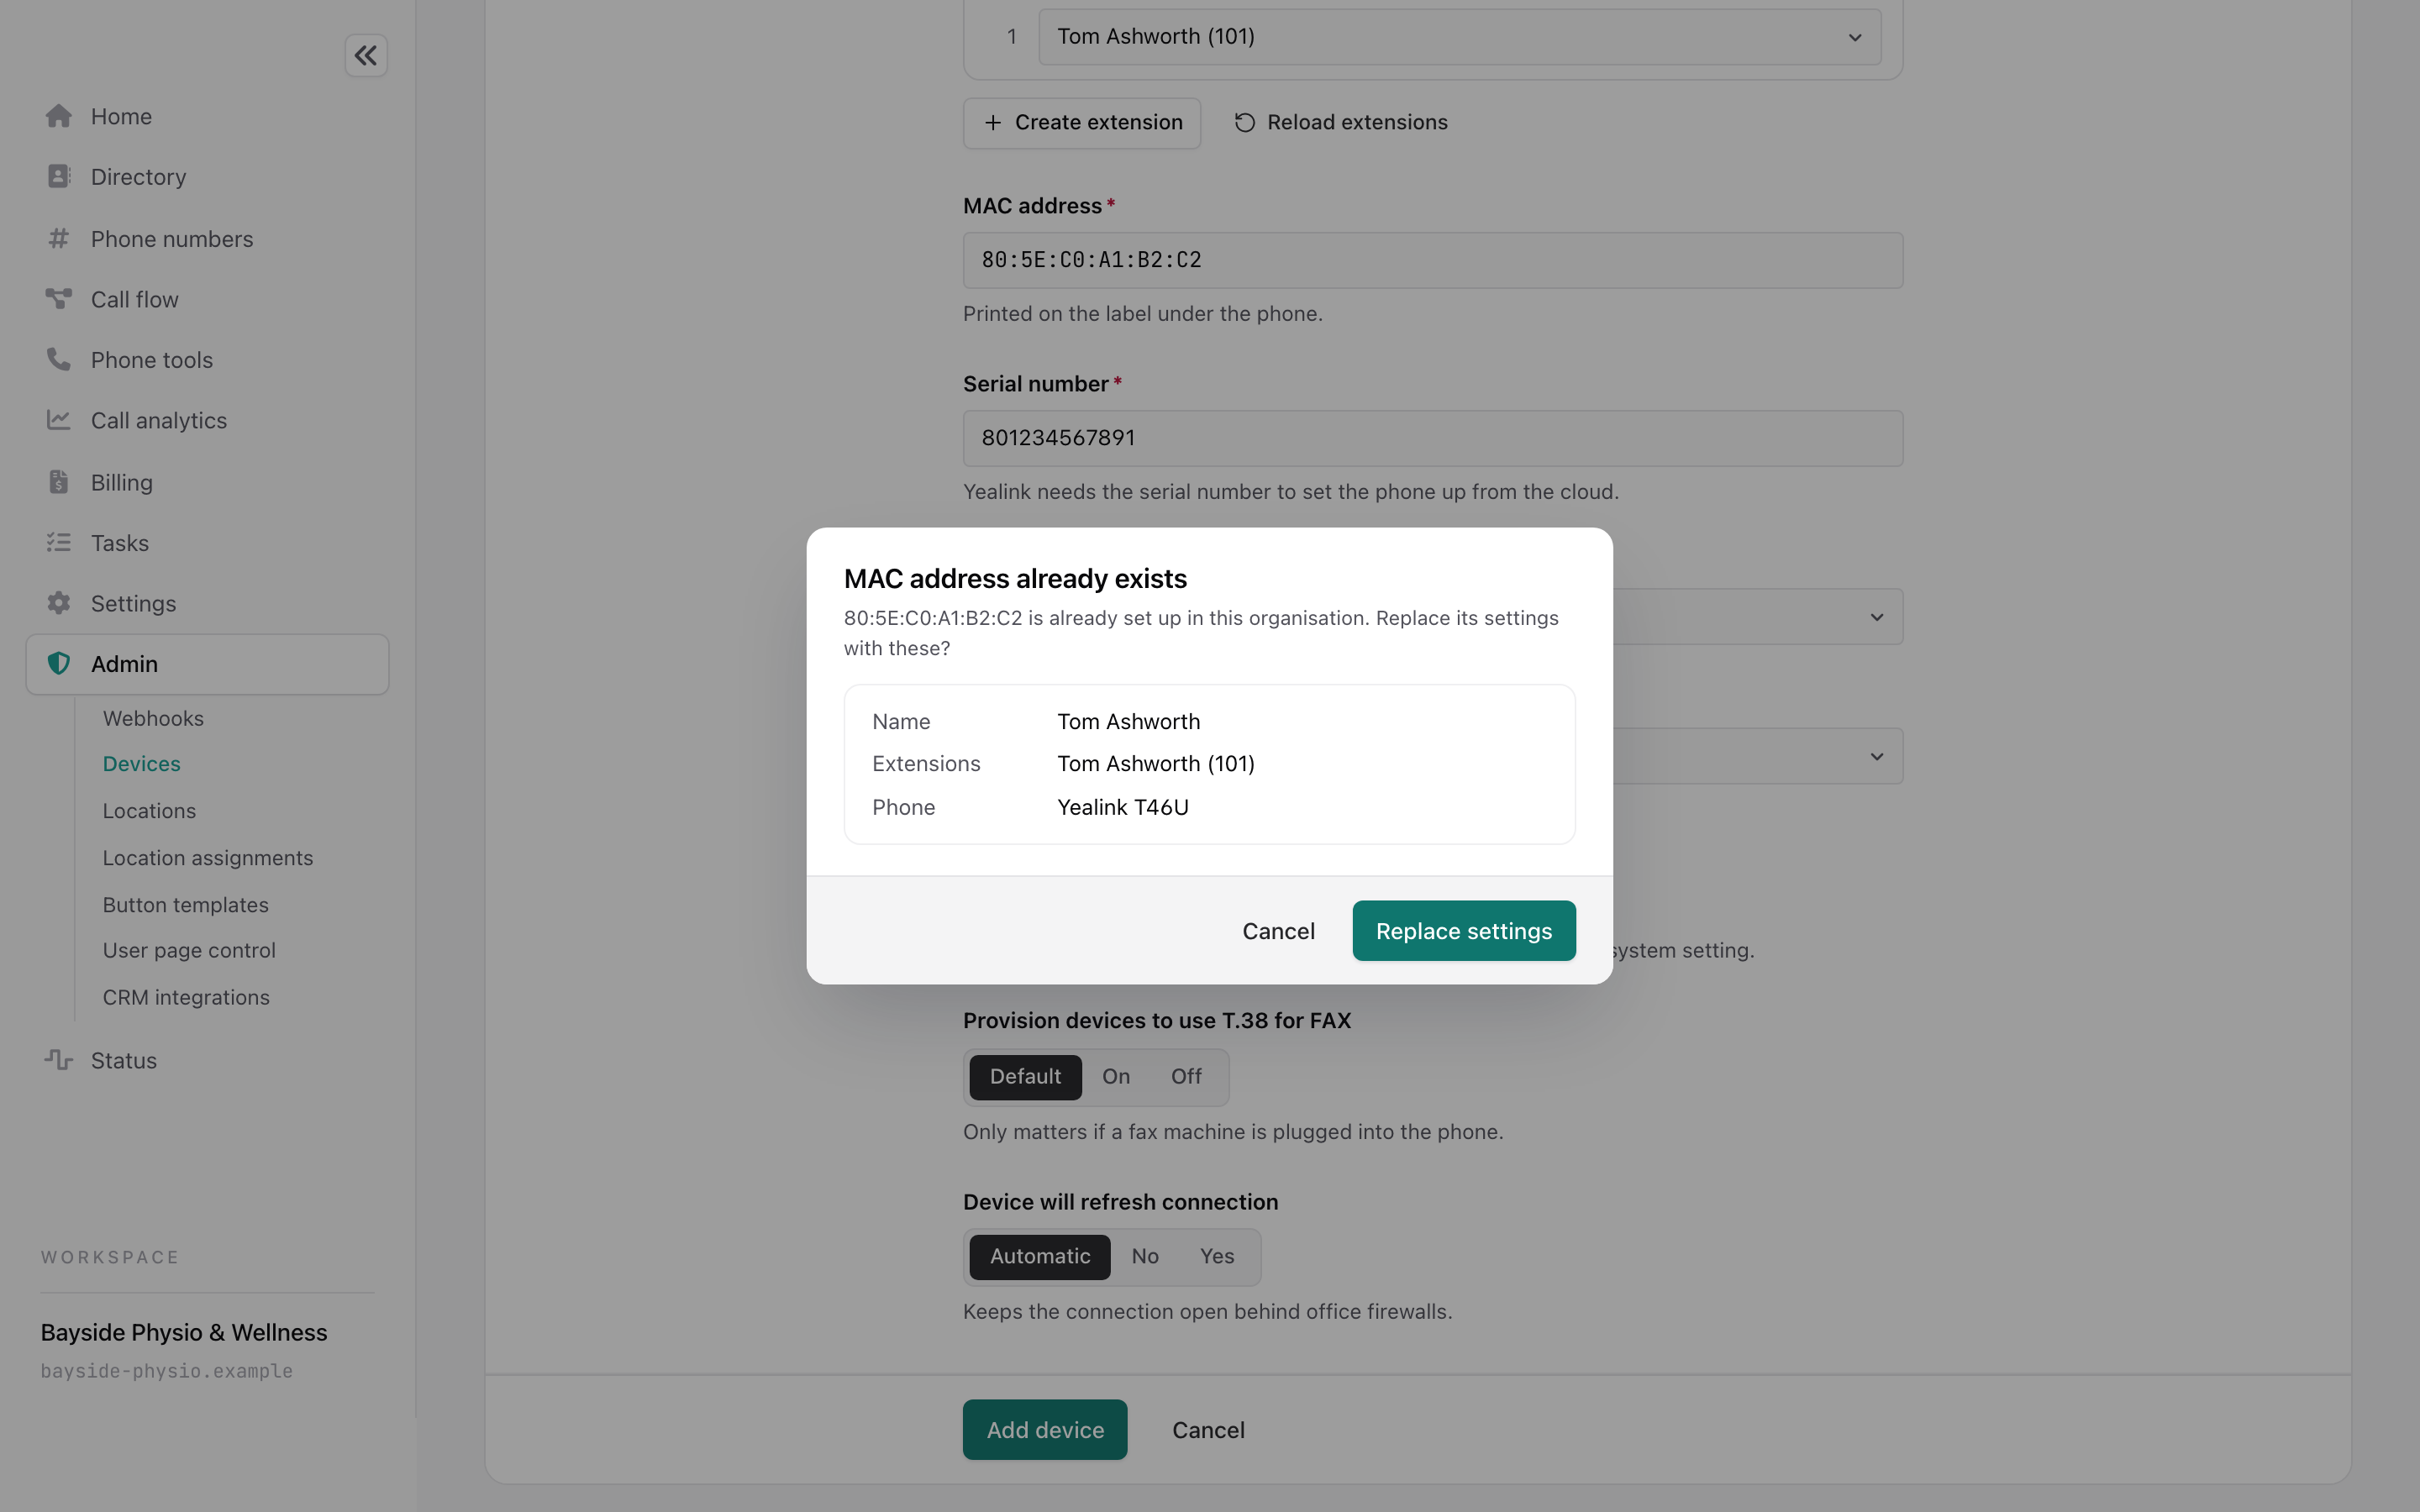
Two messages can appear when you click Add device.
MAC address already exists means a phone with that address is already set up on your system. The message shows its current name, extensions and model. Click Replace settings to overwrite them with what you just entered, or Cancel to go back.
MAC address already in use means the phone is set up in another organisation. You can't add it here. Whoever manages that organisation must remove it first, then you can try again.
Change one phone or several
Tick the phones, open Actions, and choose Edit. With several ticked, the choice reads Edit 3 devices.
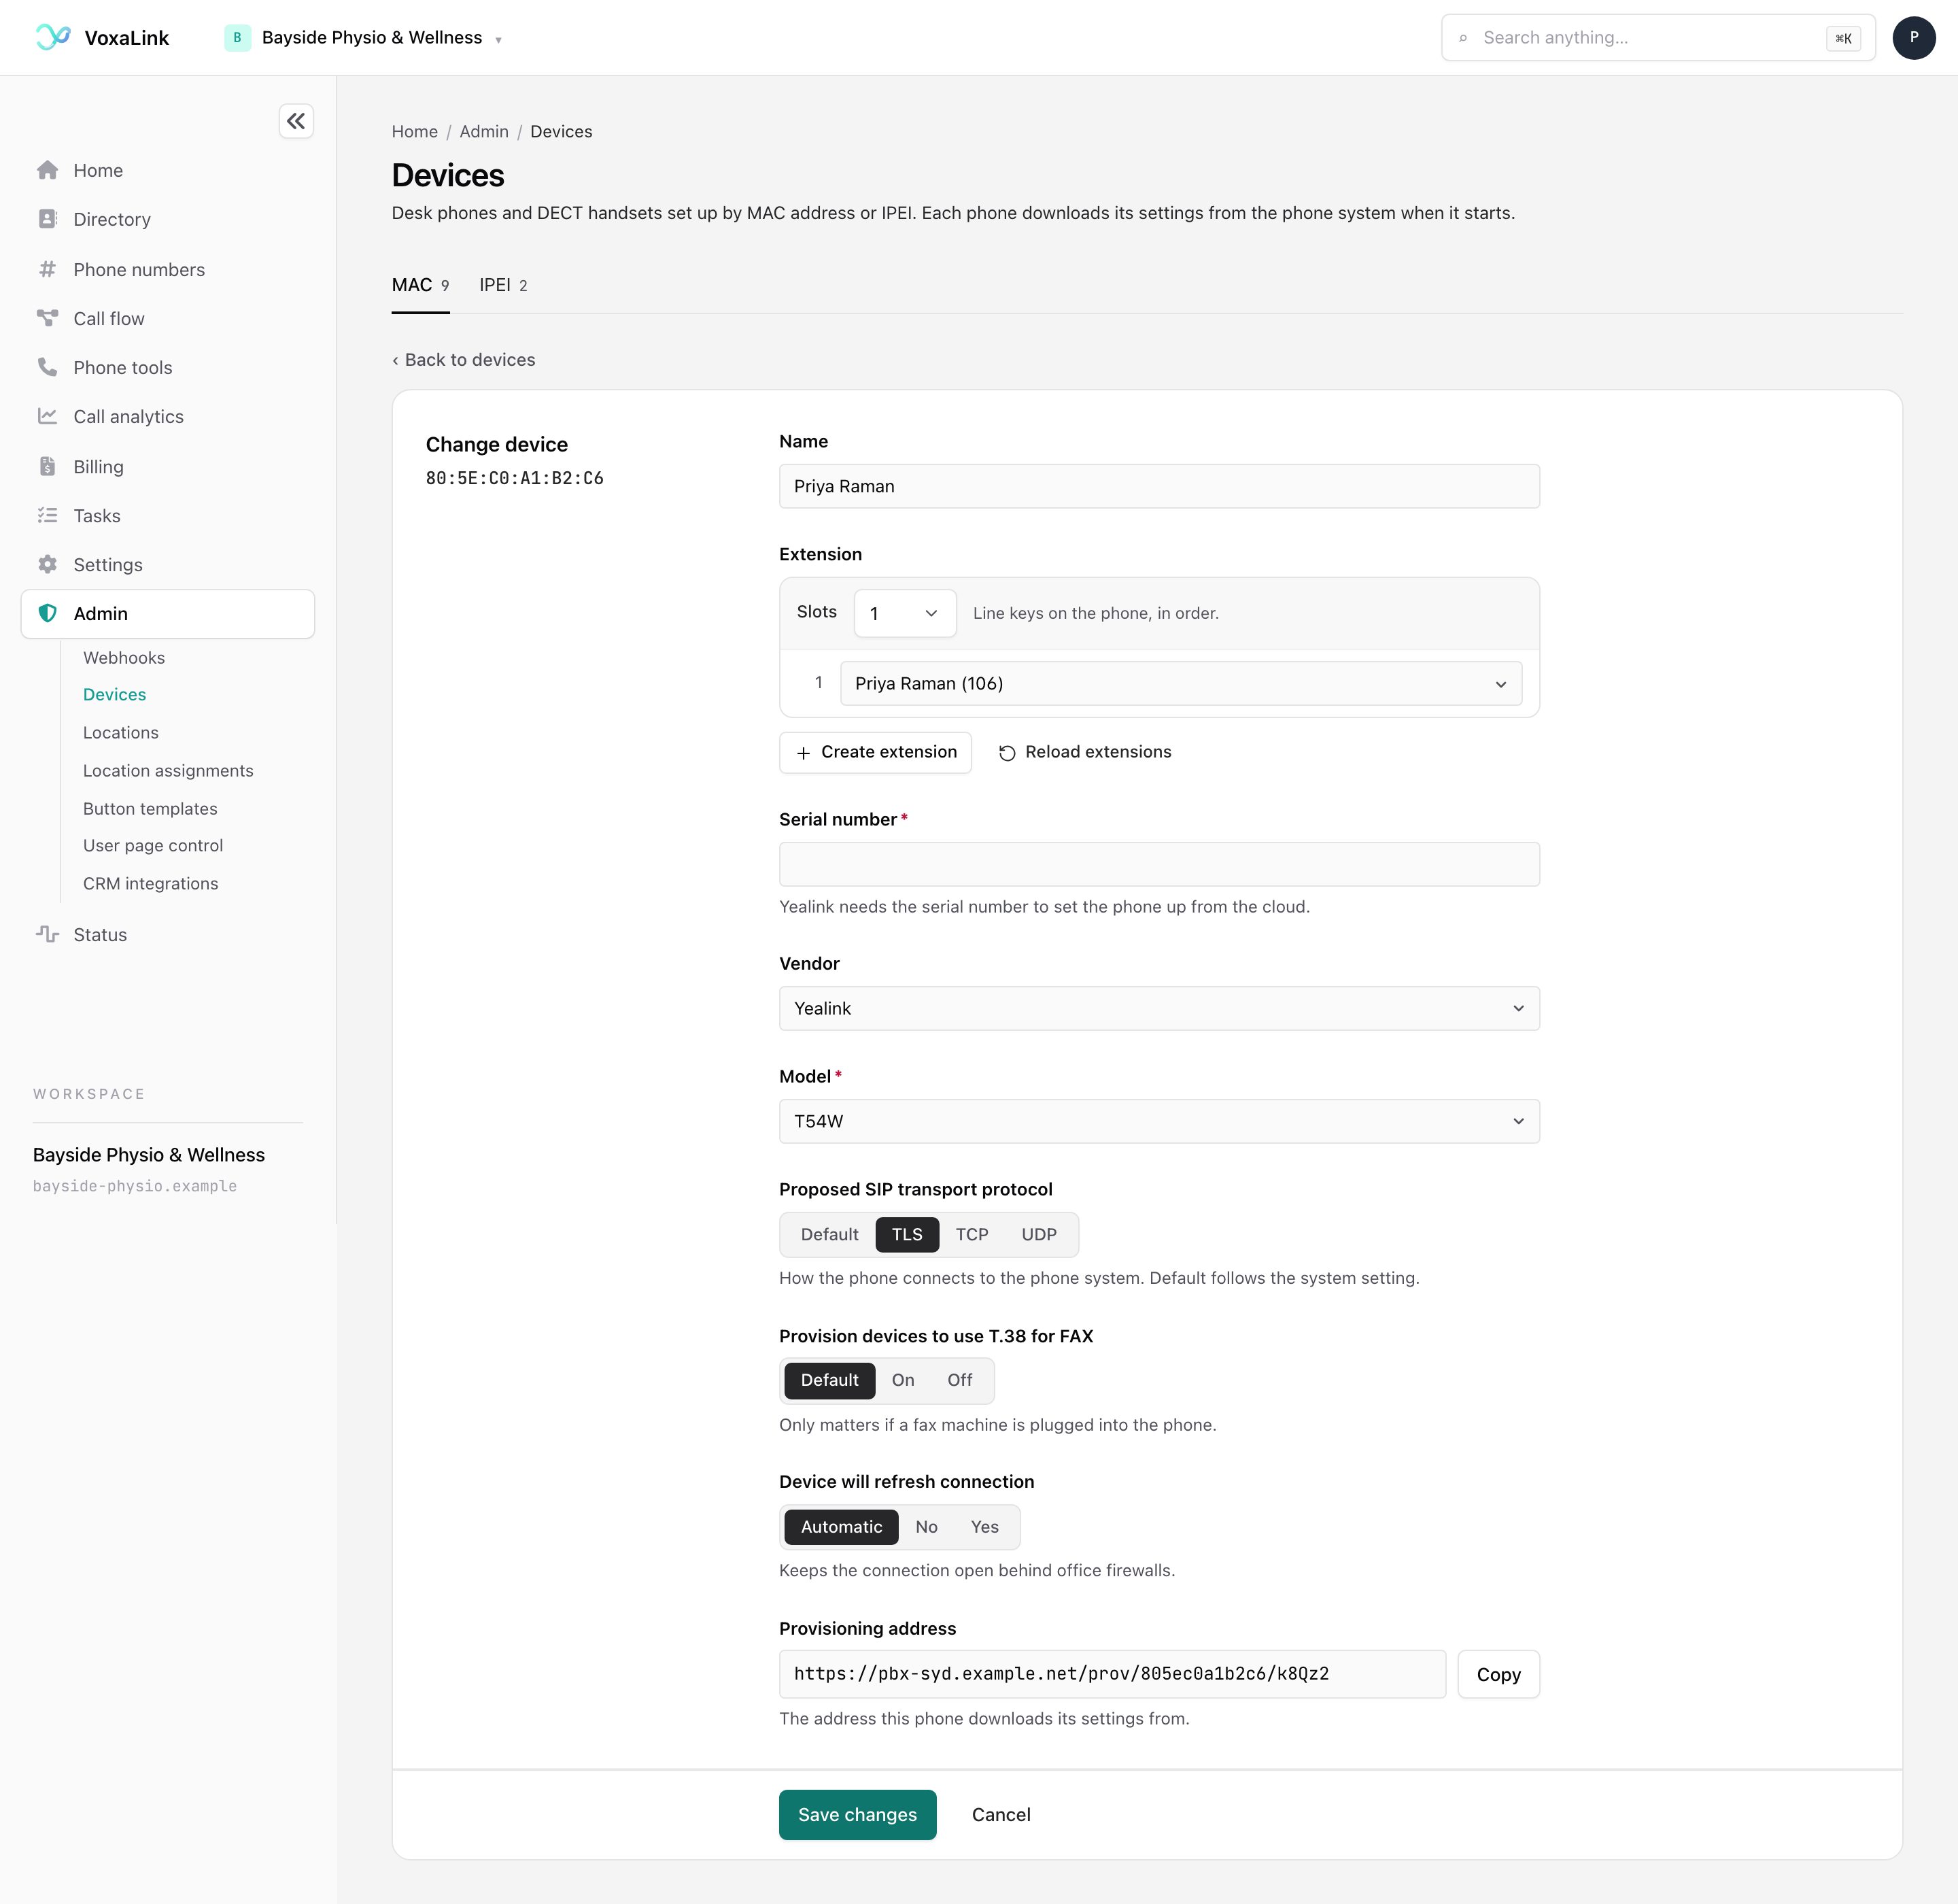
For one phone, the form is the same as adding, with two differences. The MAC address is shown at the top and can't change. And at the bottom, a read-only Provisioning address shows where this phone downloads its settings. Click Copy to copy it. You rarely need it. Your installer may ask for it.
For several phones, the page is titled Change 2 devices. Only the fields you change are saved. Everything else on each phone stays as it was. Where the phones differ, the form leaves that field alone. If the phones have different names, the Name box is hidden. If they are on different extensions, a note says extensions are left as they are, so edit one phone at a time to change them. If the vendors differ, Vendor reads Different on each phone. A field such as Model starts empty, and leaving it empty keeps each phone's own value.
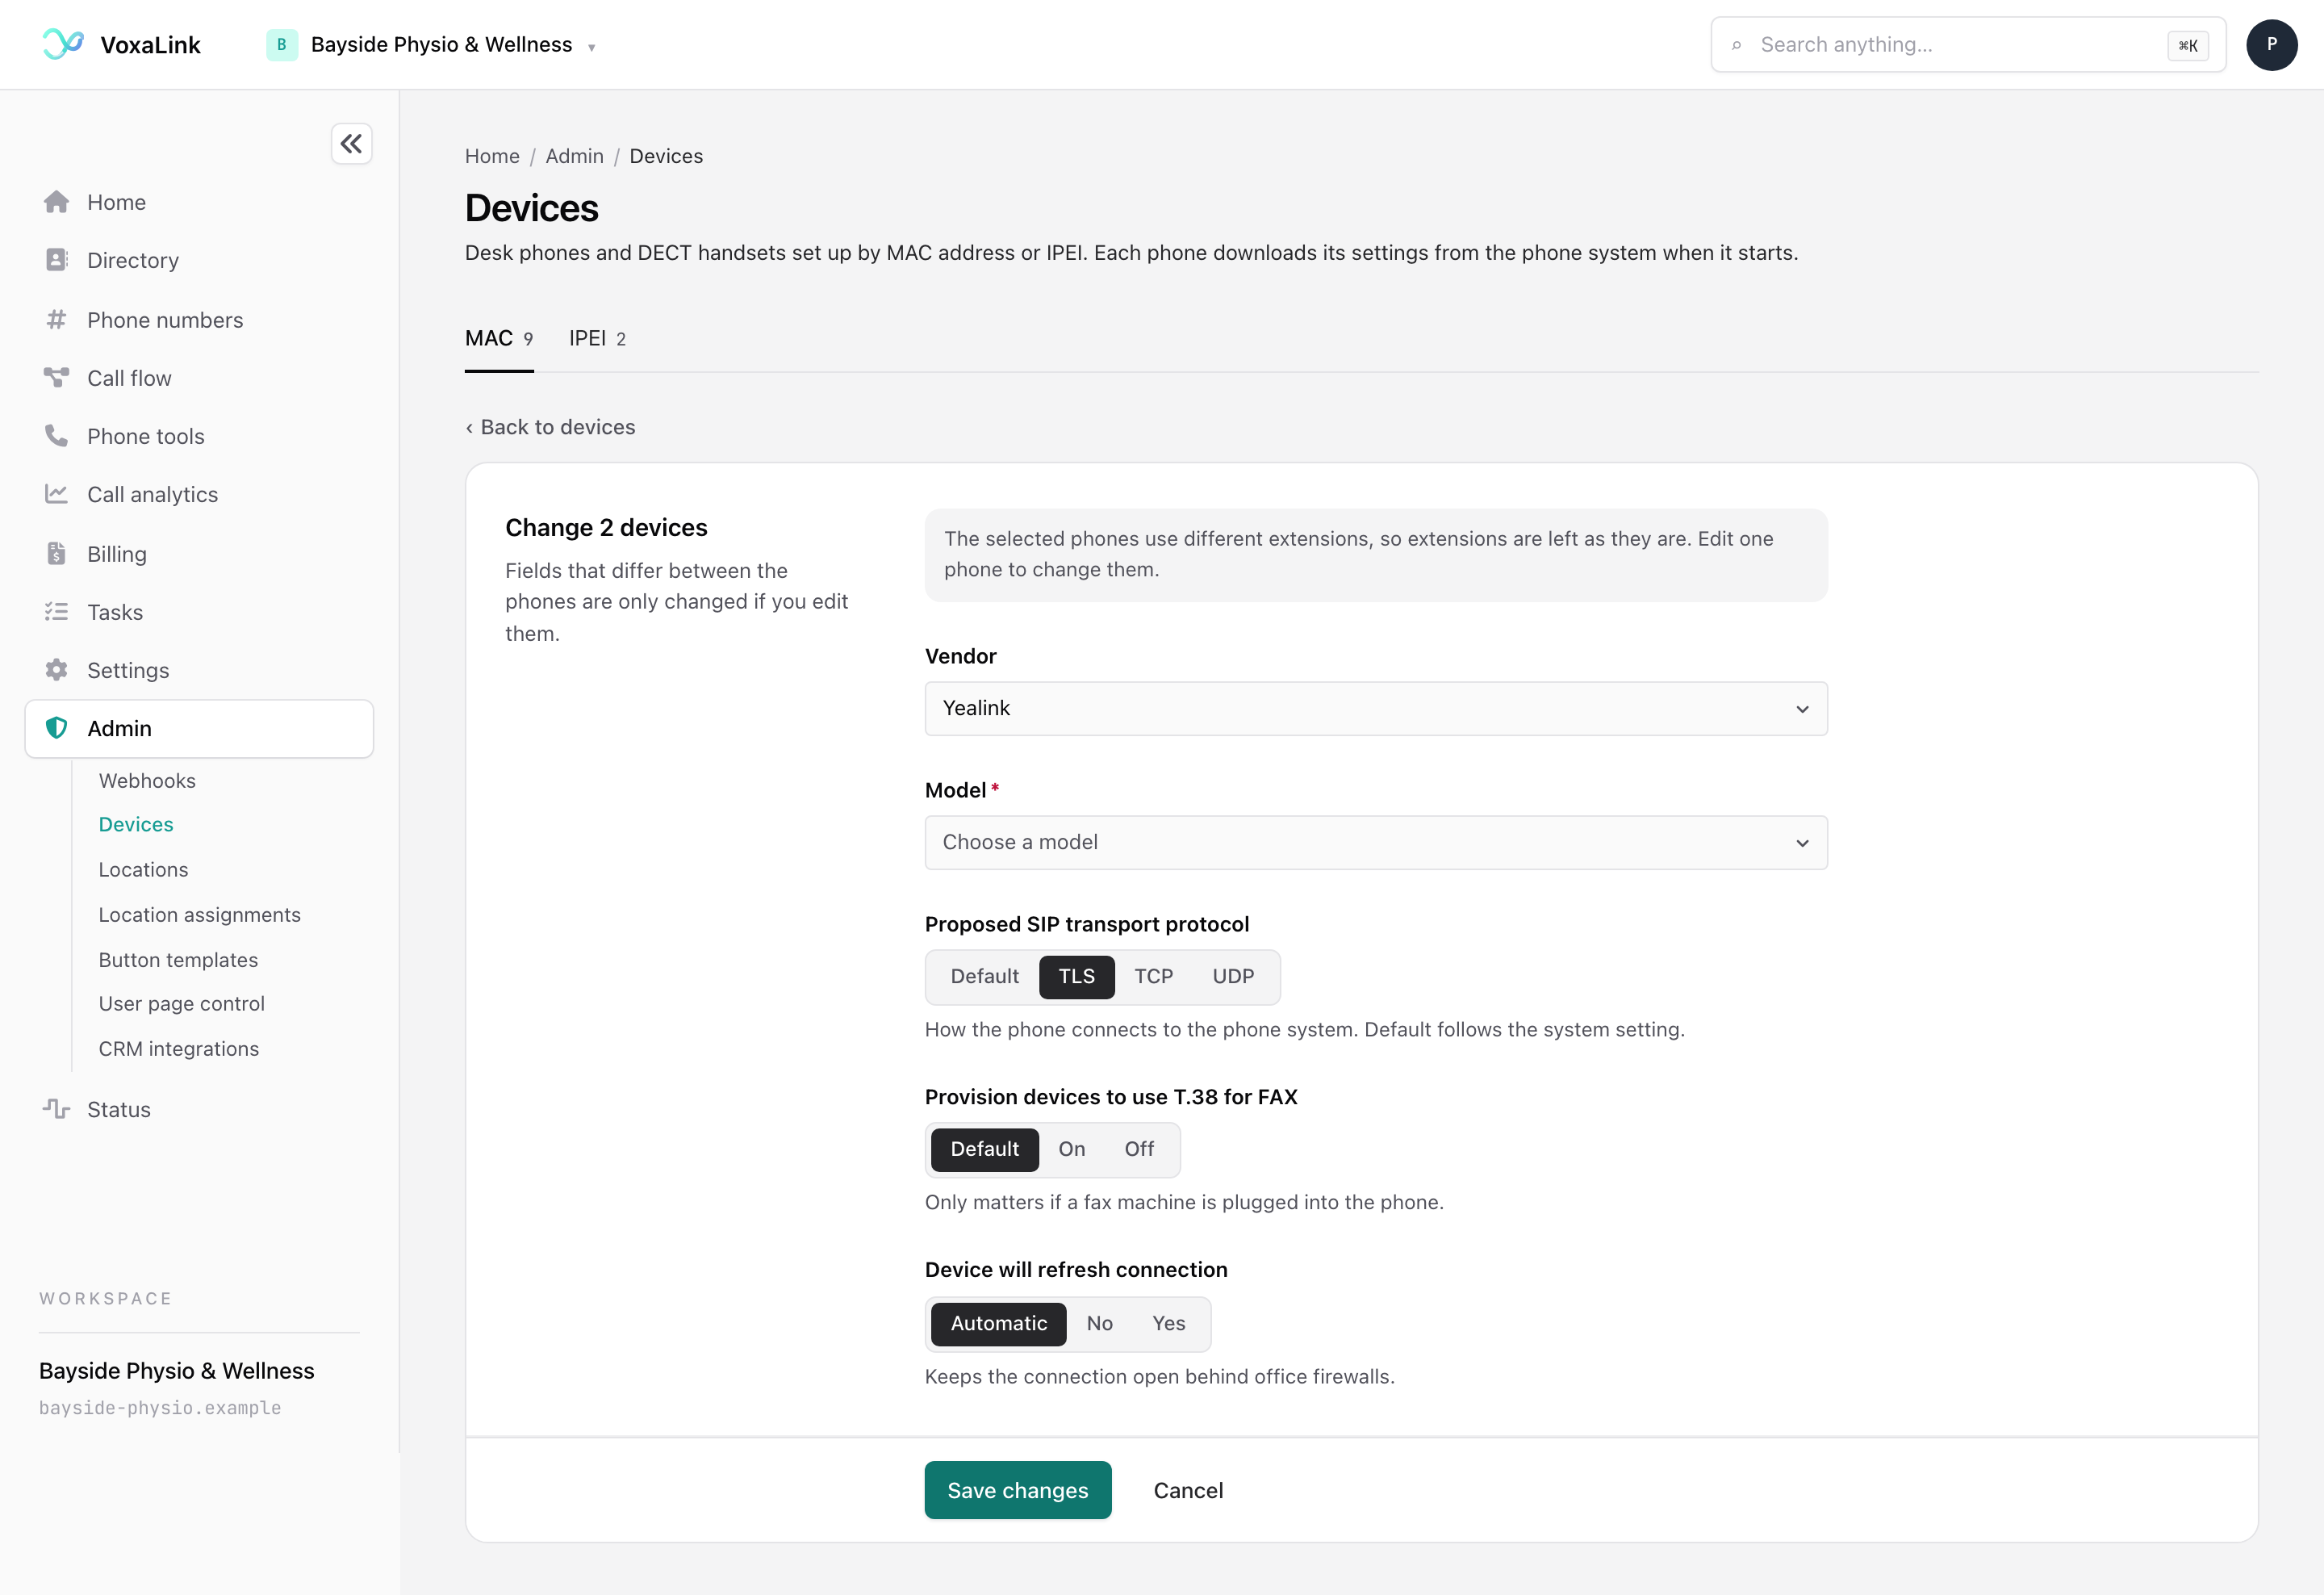
Click Save changes when you are done. A message above the list confirms how many phones were saved.
Import a list from CSV
To add many phones at once, click Add device, then Import CSV. CSV is a plain text list with one phone per line.
Put the columns in this order:
MAC;Extension;Name;Vendor;Model;Serial number
Separate them with semicolons, commas or tabs. Paste your list into the box. For example:
805EC0123401;102;Treatment room 1;Yealink;T31G;801234567801805EC0A1B2C2;101;Front desk;Yealink;T46U;801234567802805EC0123402;104;Treatment room 2;Yealink;T31G;801234567803
A Preview shows the first 5 lines as a table, so you can check each value landed in the right column. The button at the bottom counts the lines, for example Import 3 devices.
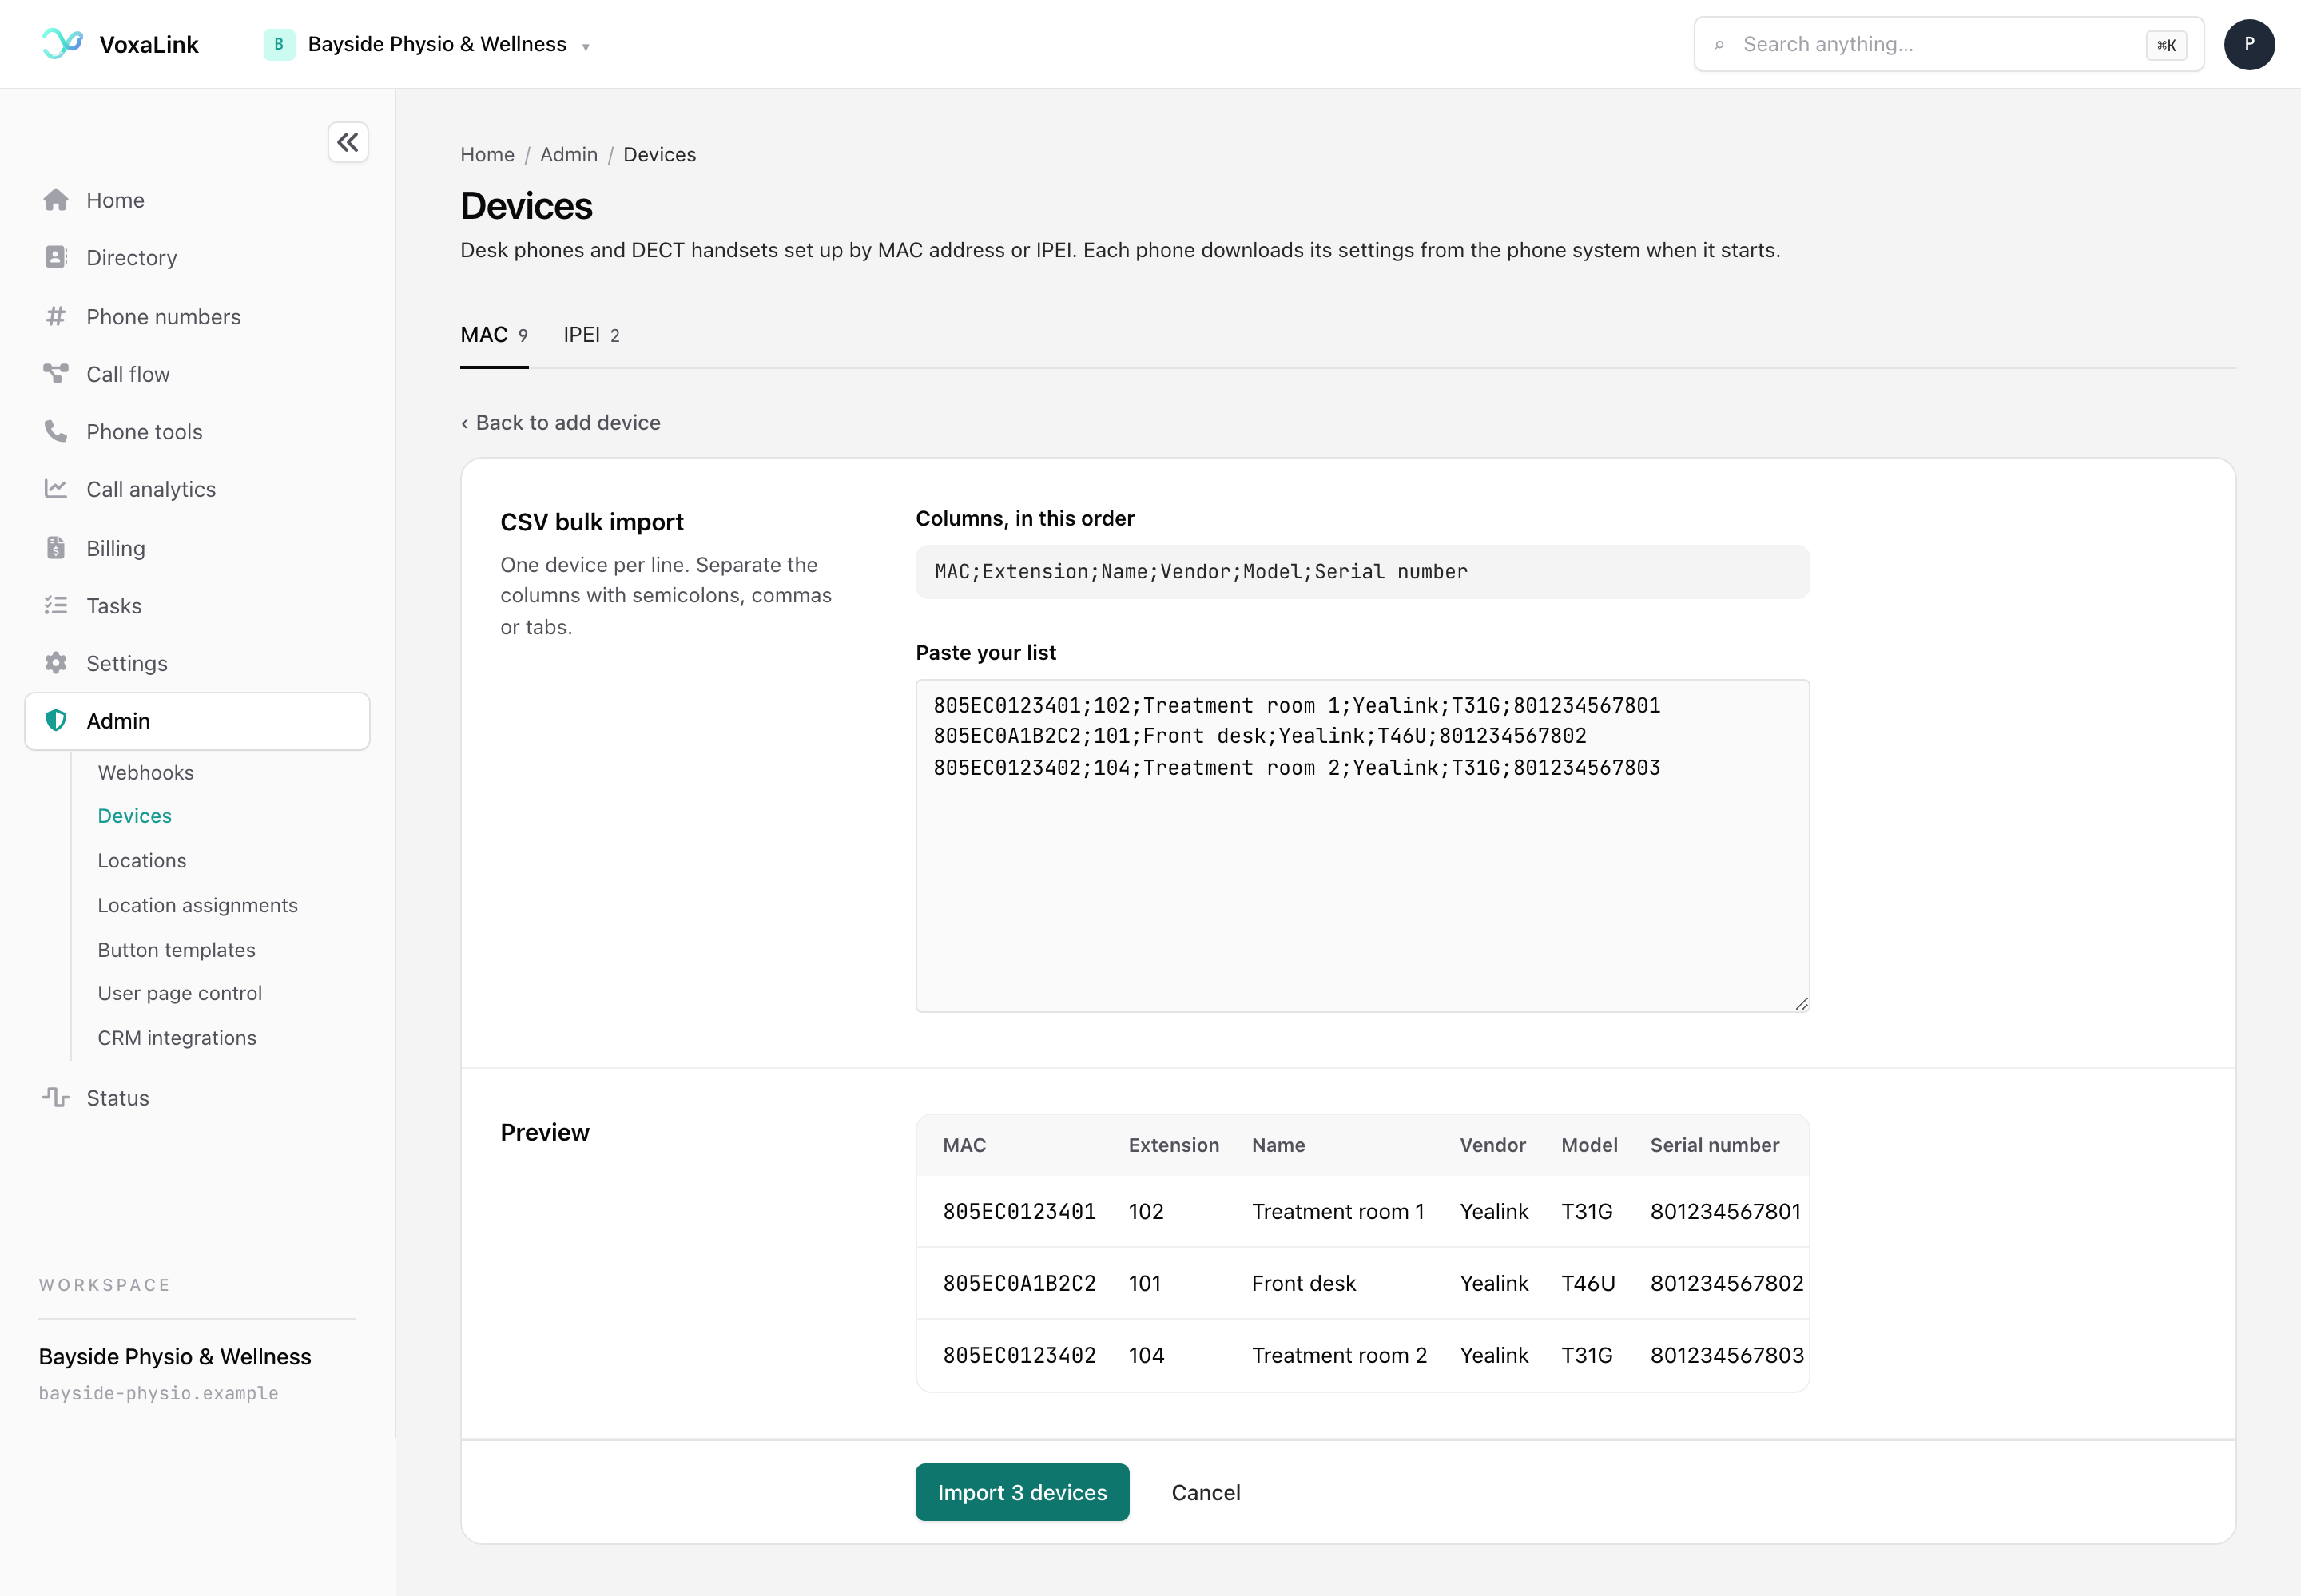
Click it. A bar shows progress while phones are added one by one. When it finishes, a box lists how many were added and why any were not. Click Done to close it.
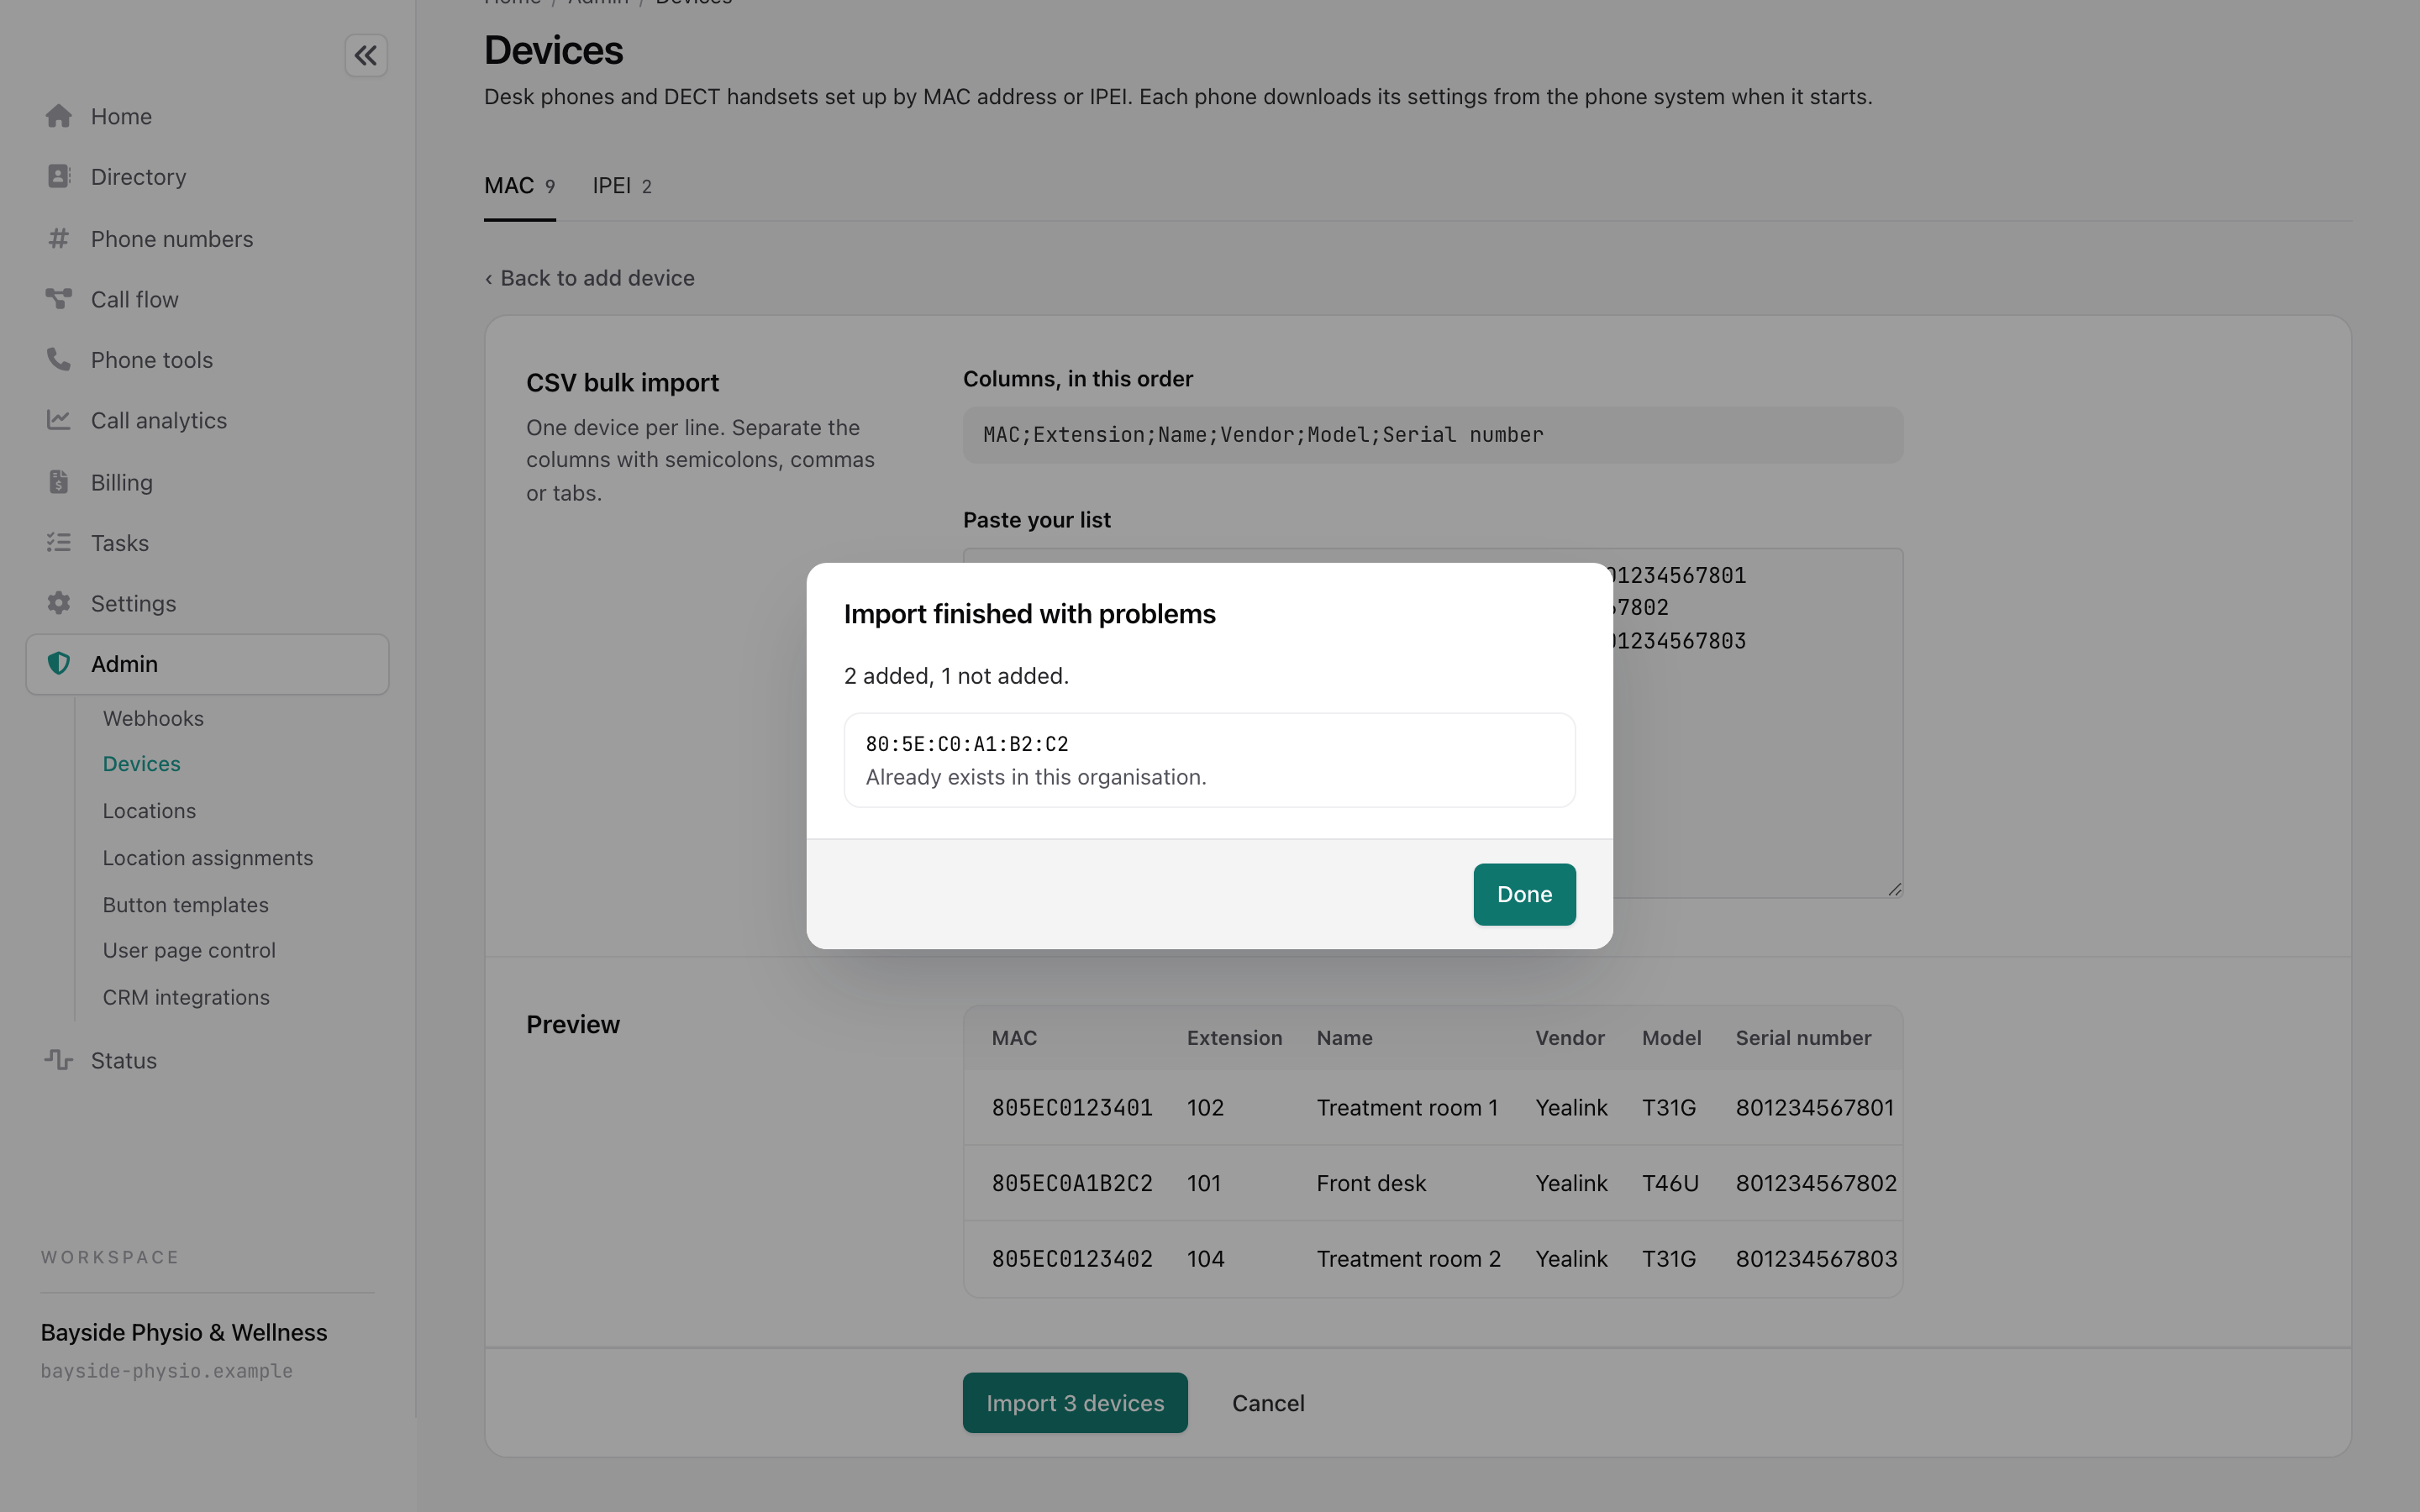
Phones already on your system are skipped, not replaced. So are lines whose MAC address appears twice in your list. Fix those lines and import them again, or use Edit on the phone. A line with no name is called "Extension" followed by its number, such as "Extension 102".
A phone's own tab
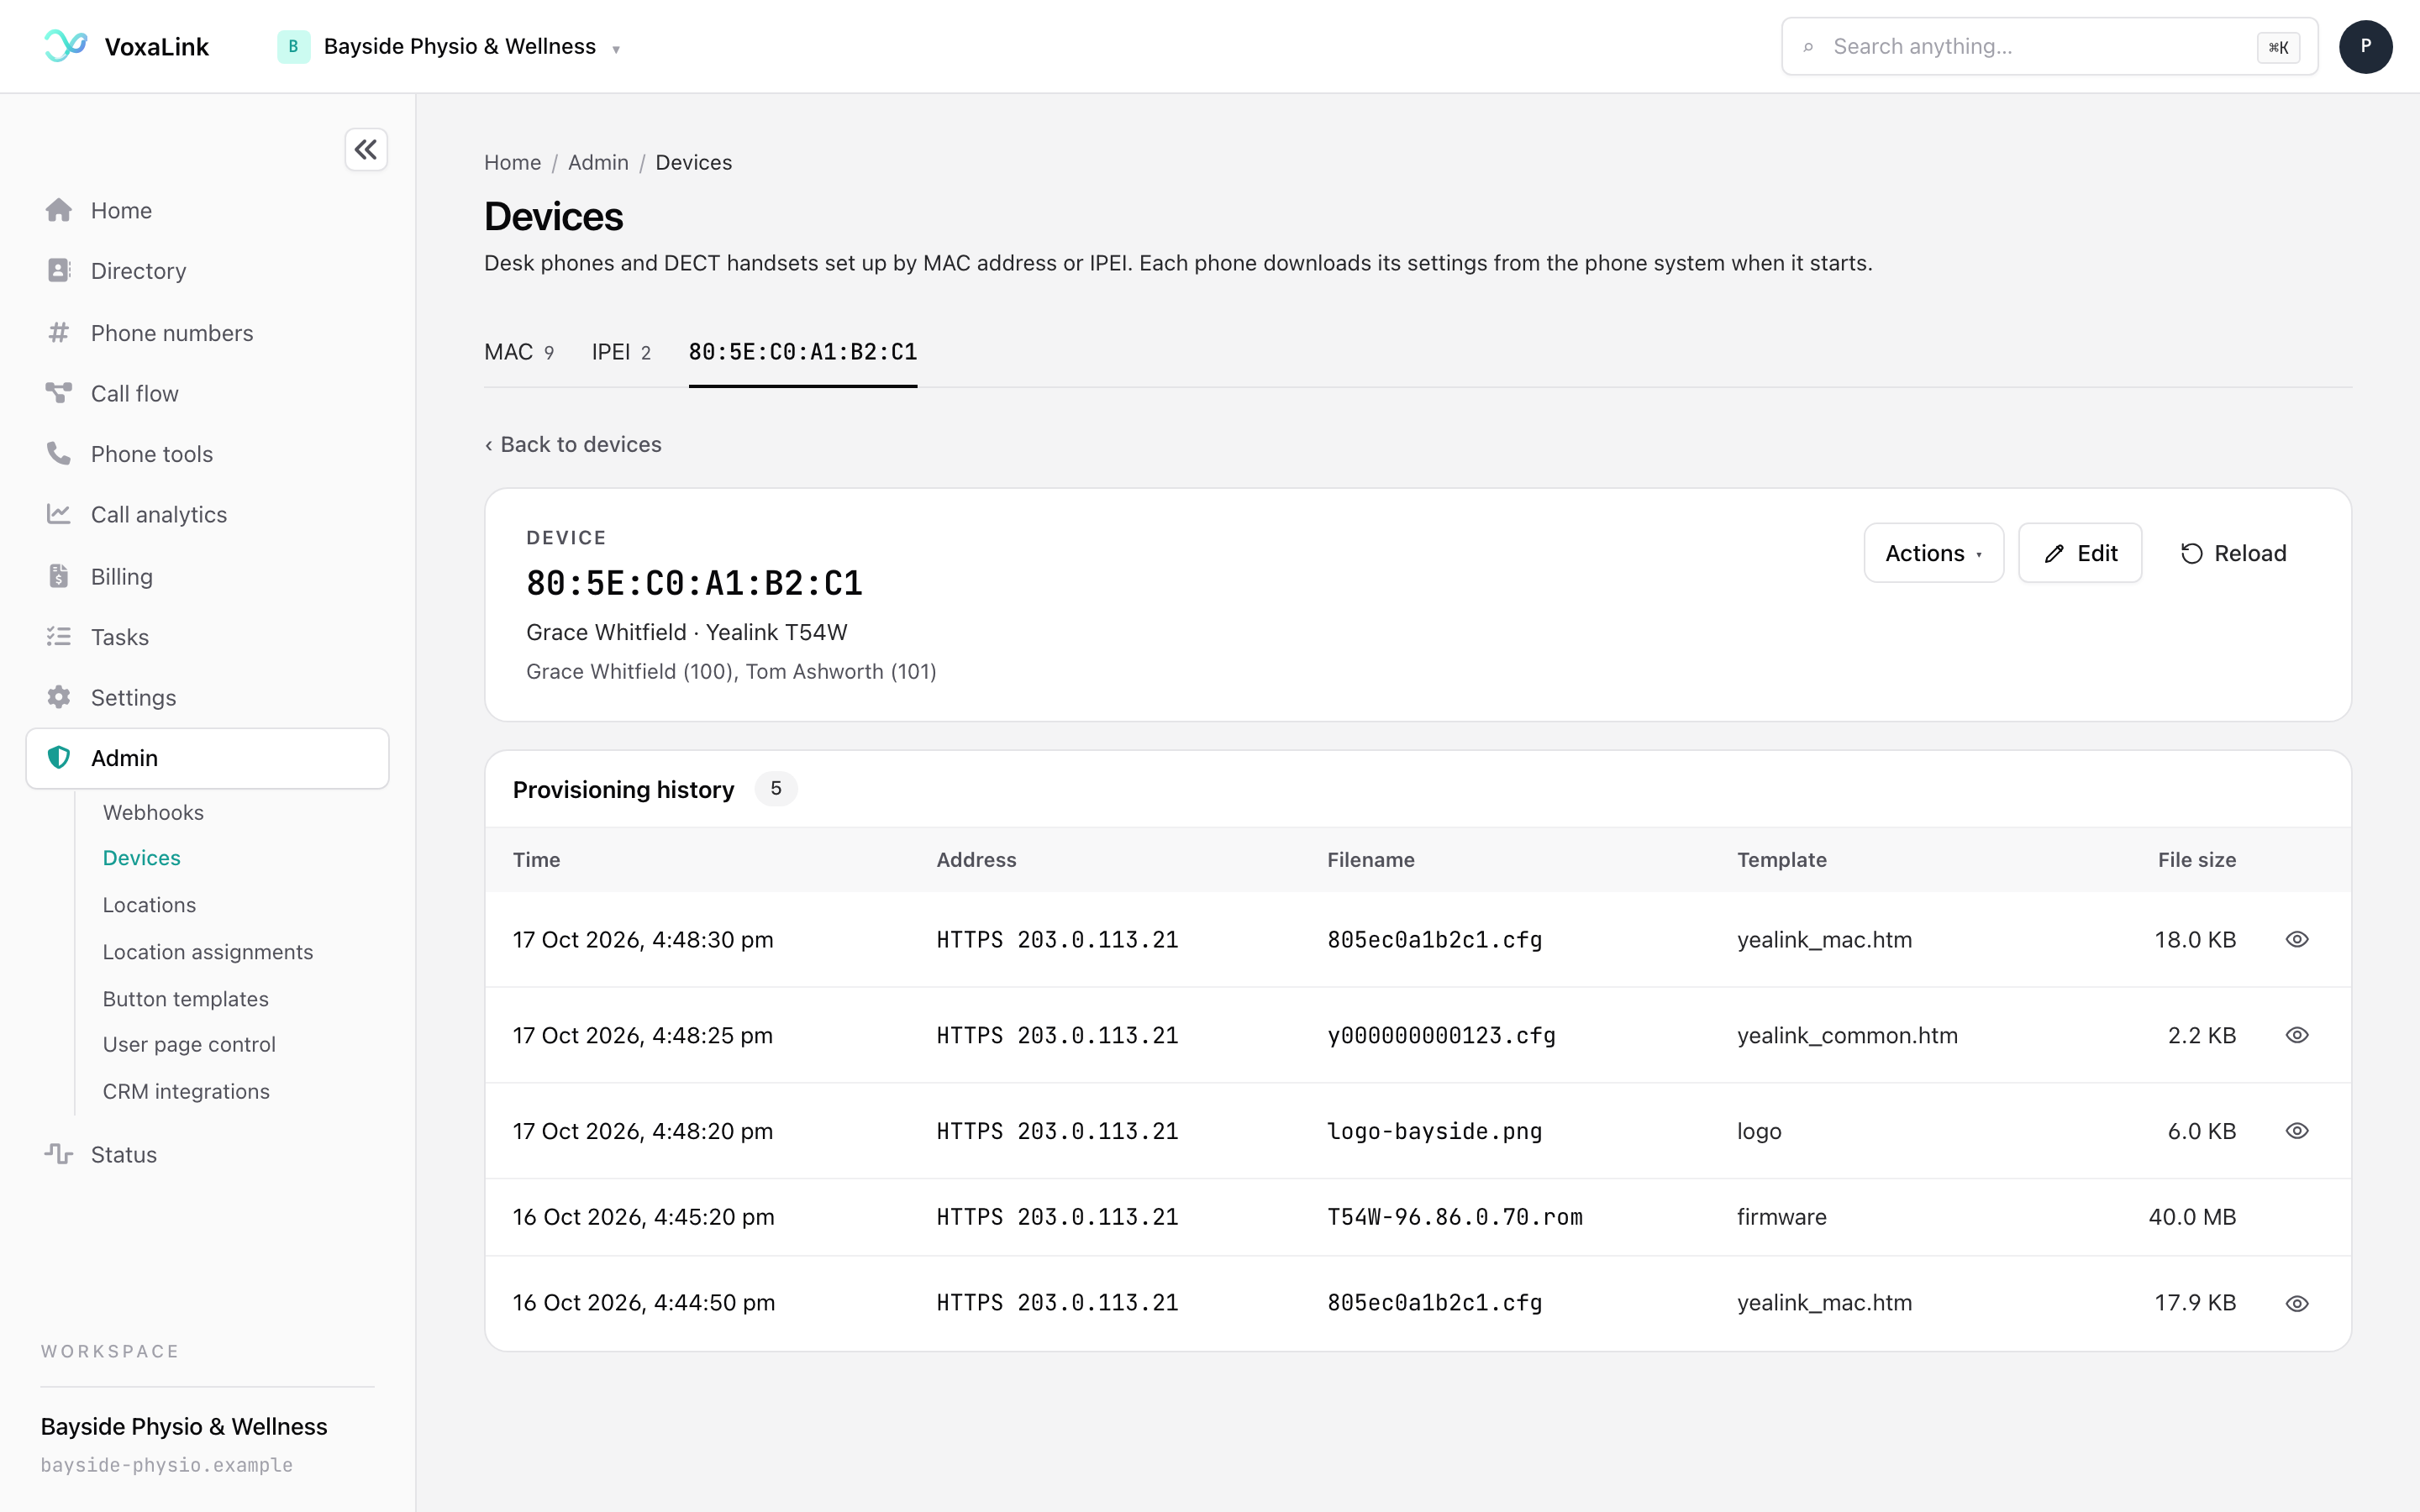
Click a phone's MAC address in the list to open its tab. The top shows the MAC address, name, vendor, model and extensions. On the right are Actions, Edit and Reload. Reload refreshes the history.
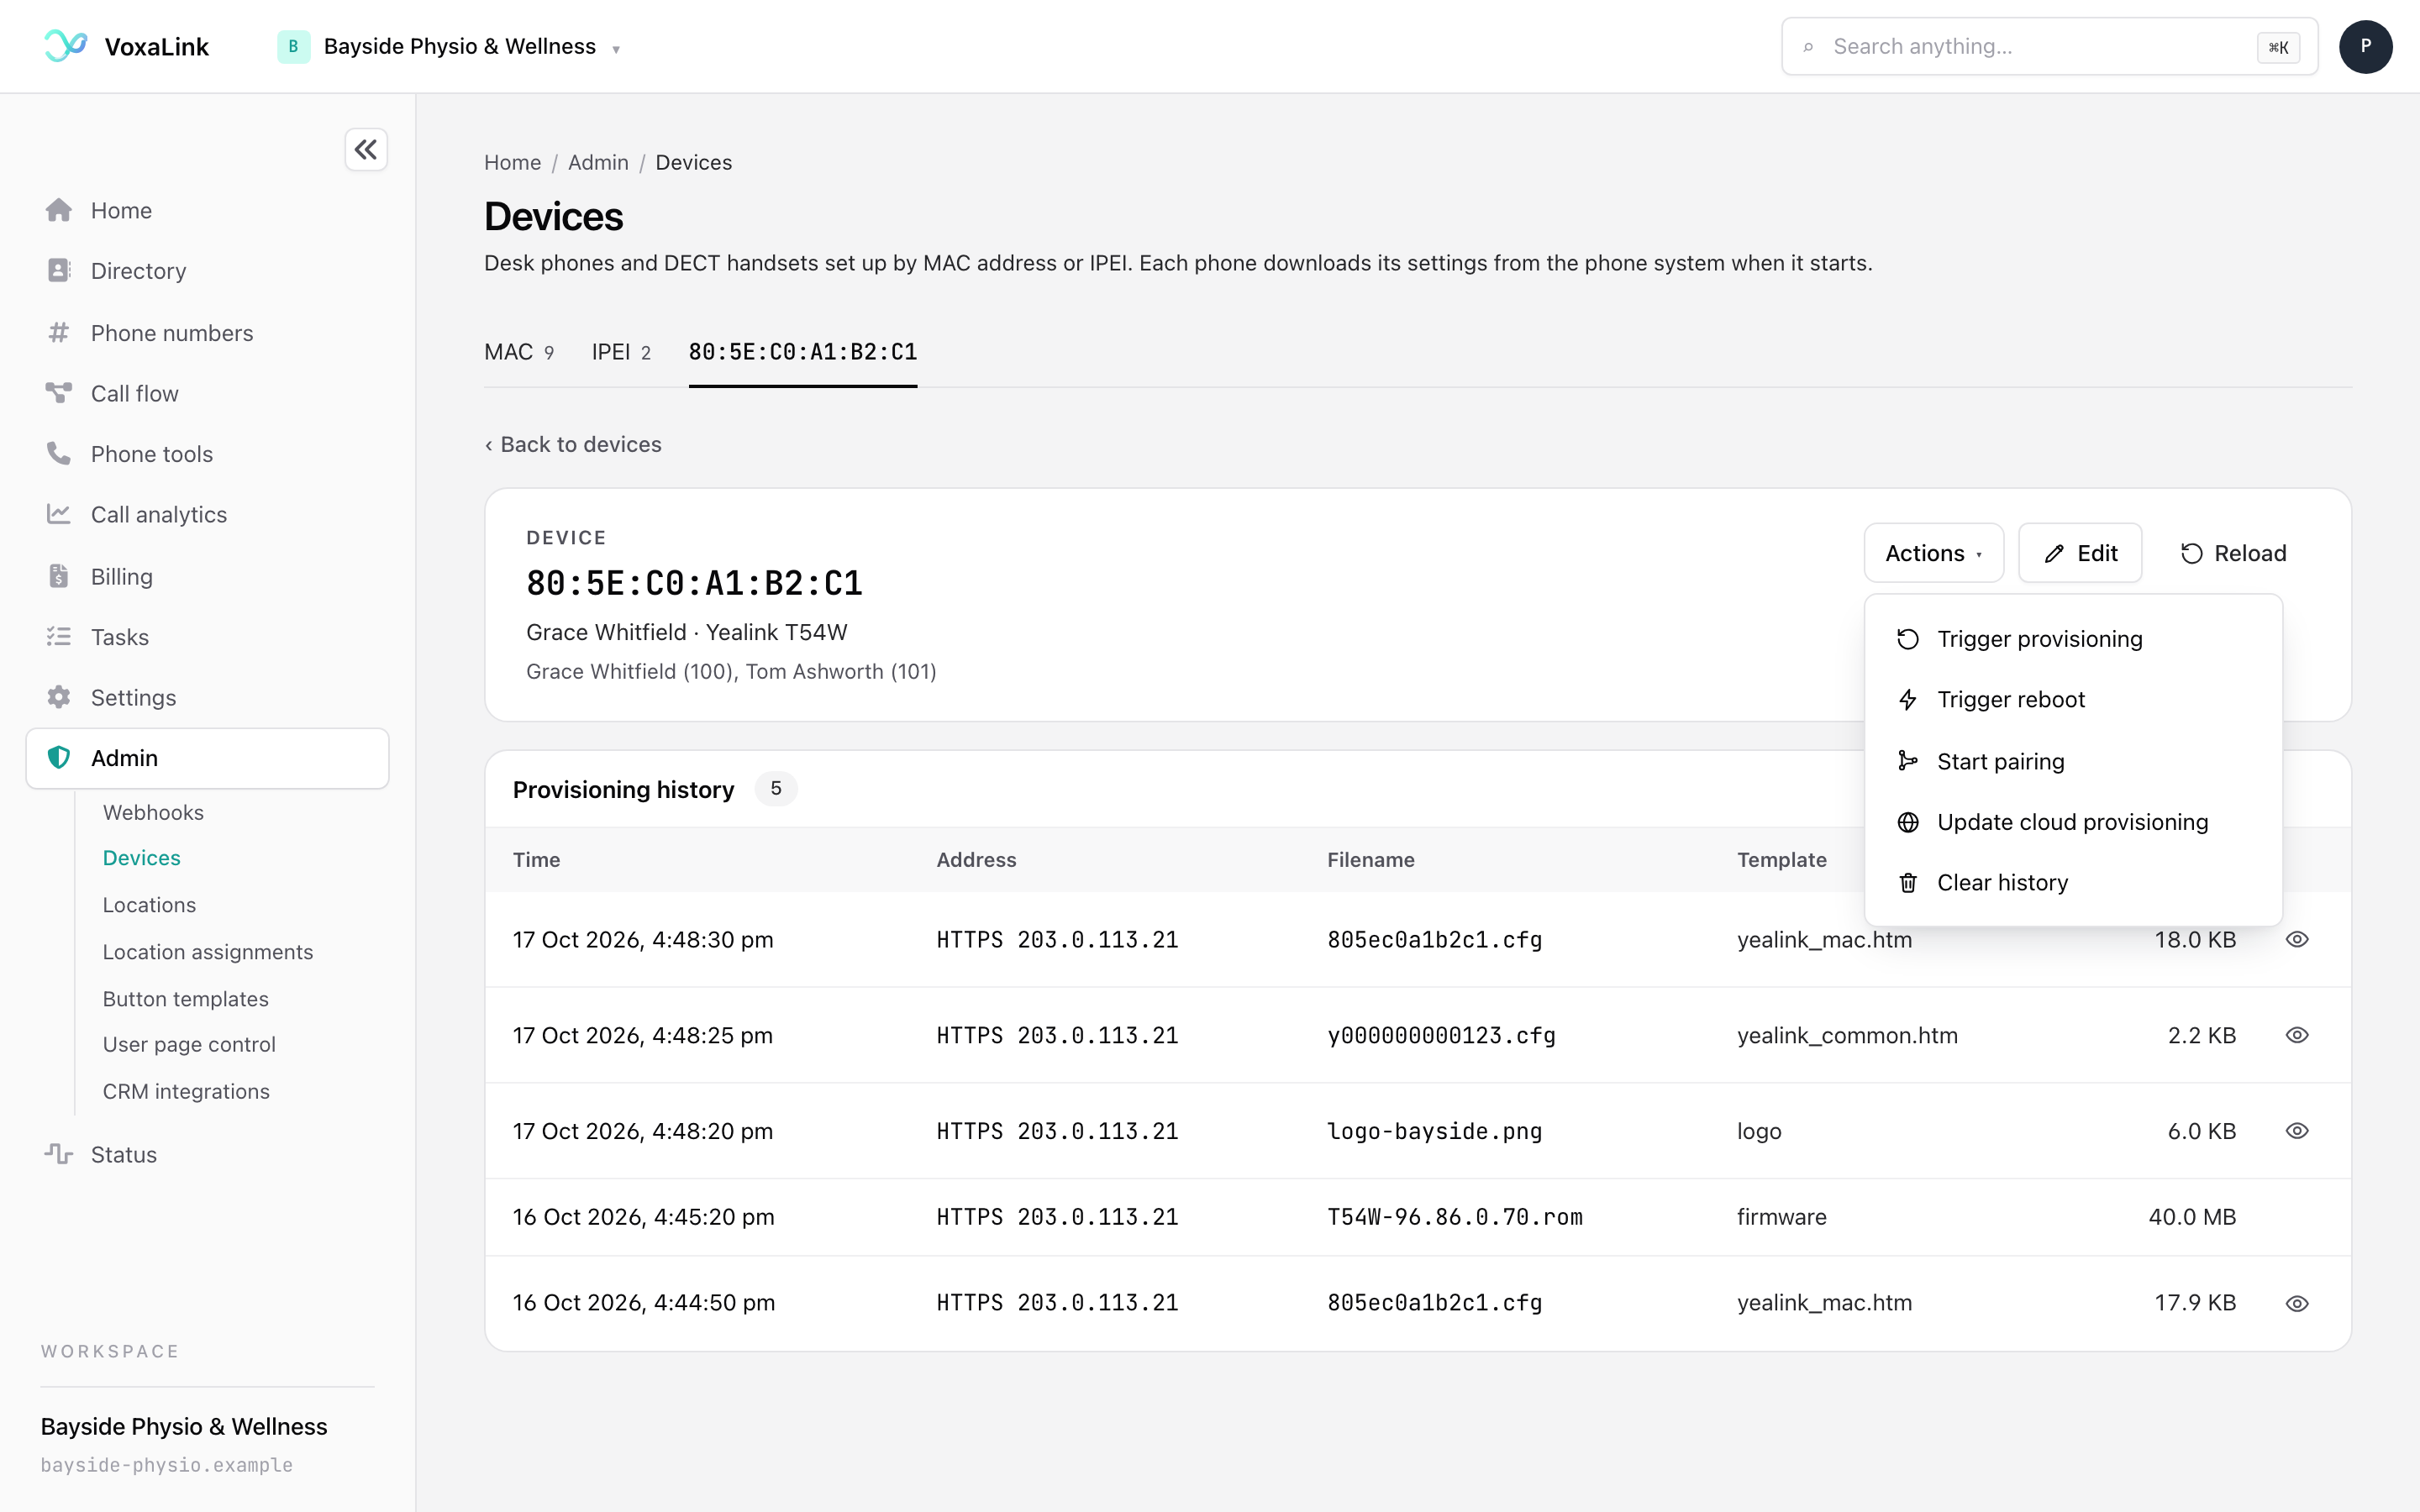
Actions has these choices:
- Trigger provisioning tells the phone to download its settings now.
- Trigger reboot restarts the phone. It asks first, because any call on that phone drops. Click Restart phone to go ahead or Cancel to stop.
- Start pairing opens a pairing window so a new phone can connect. Power on or restart the phone while it runs.
- Update cloud provisioning updates the phone's entry in the maker's cloud set-up service.
- Clear history removes the download history shown on this tab. It asks first. The phone's settings are not changed.
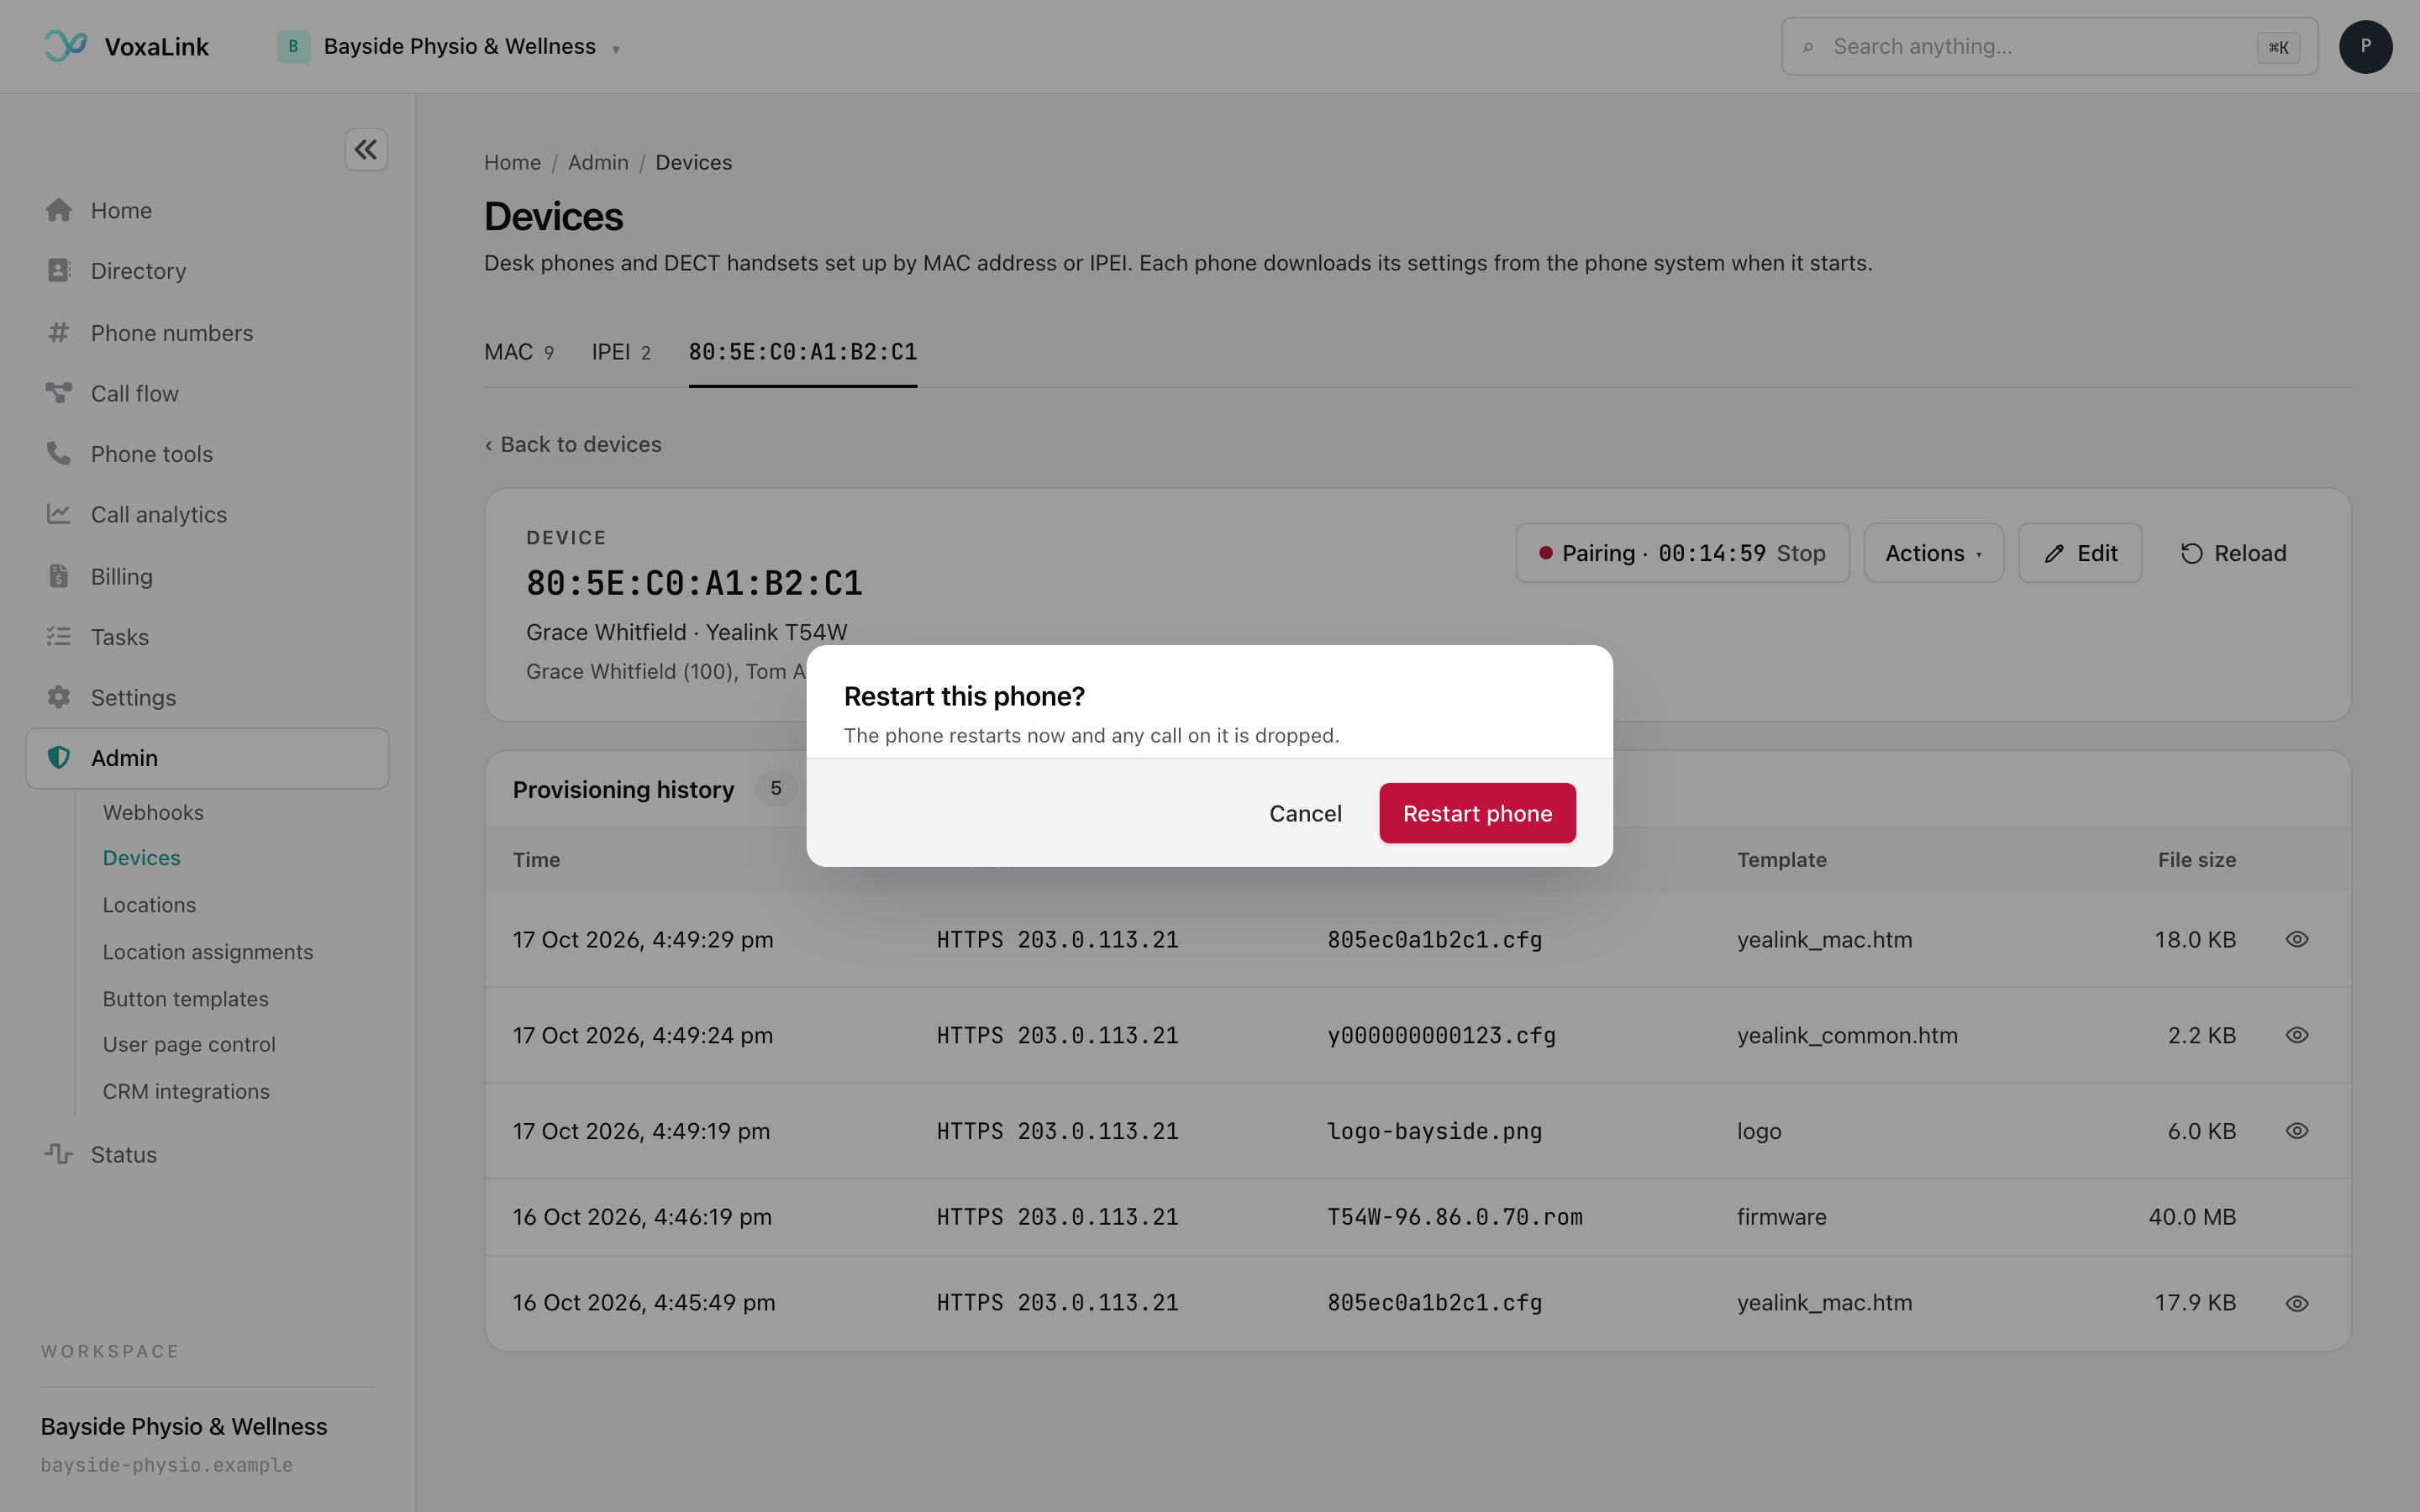
While pairing runs, a button at the top reads Pairing, then a countdown, then Stop. The countdown shows how long pairing stays open. Click the button to stop early.
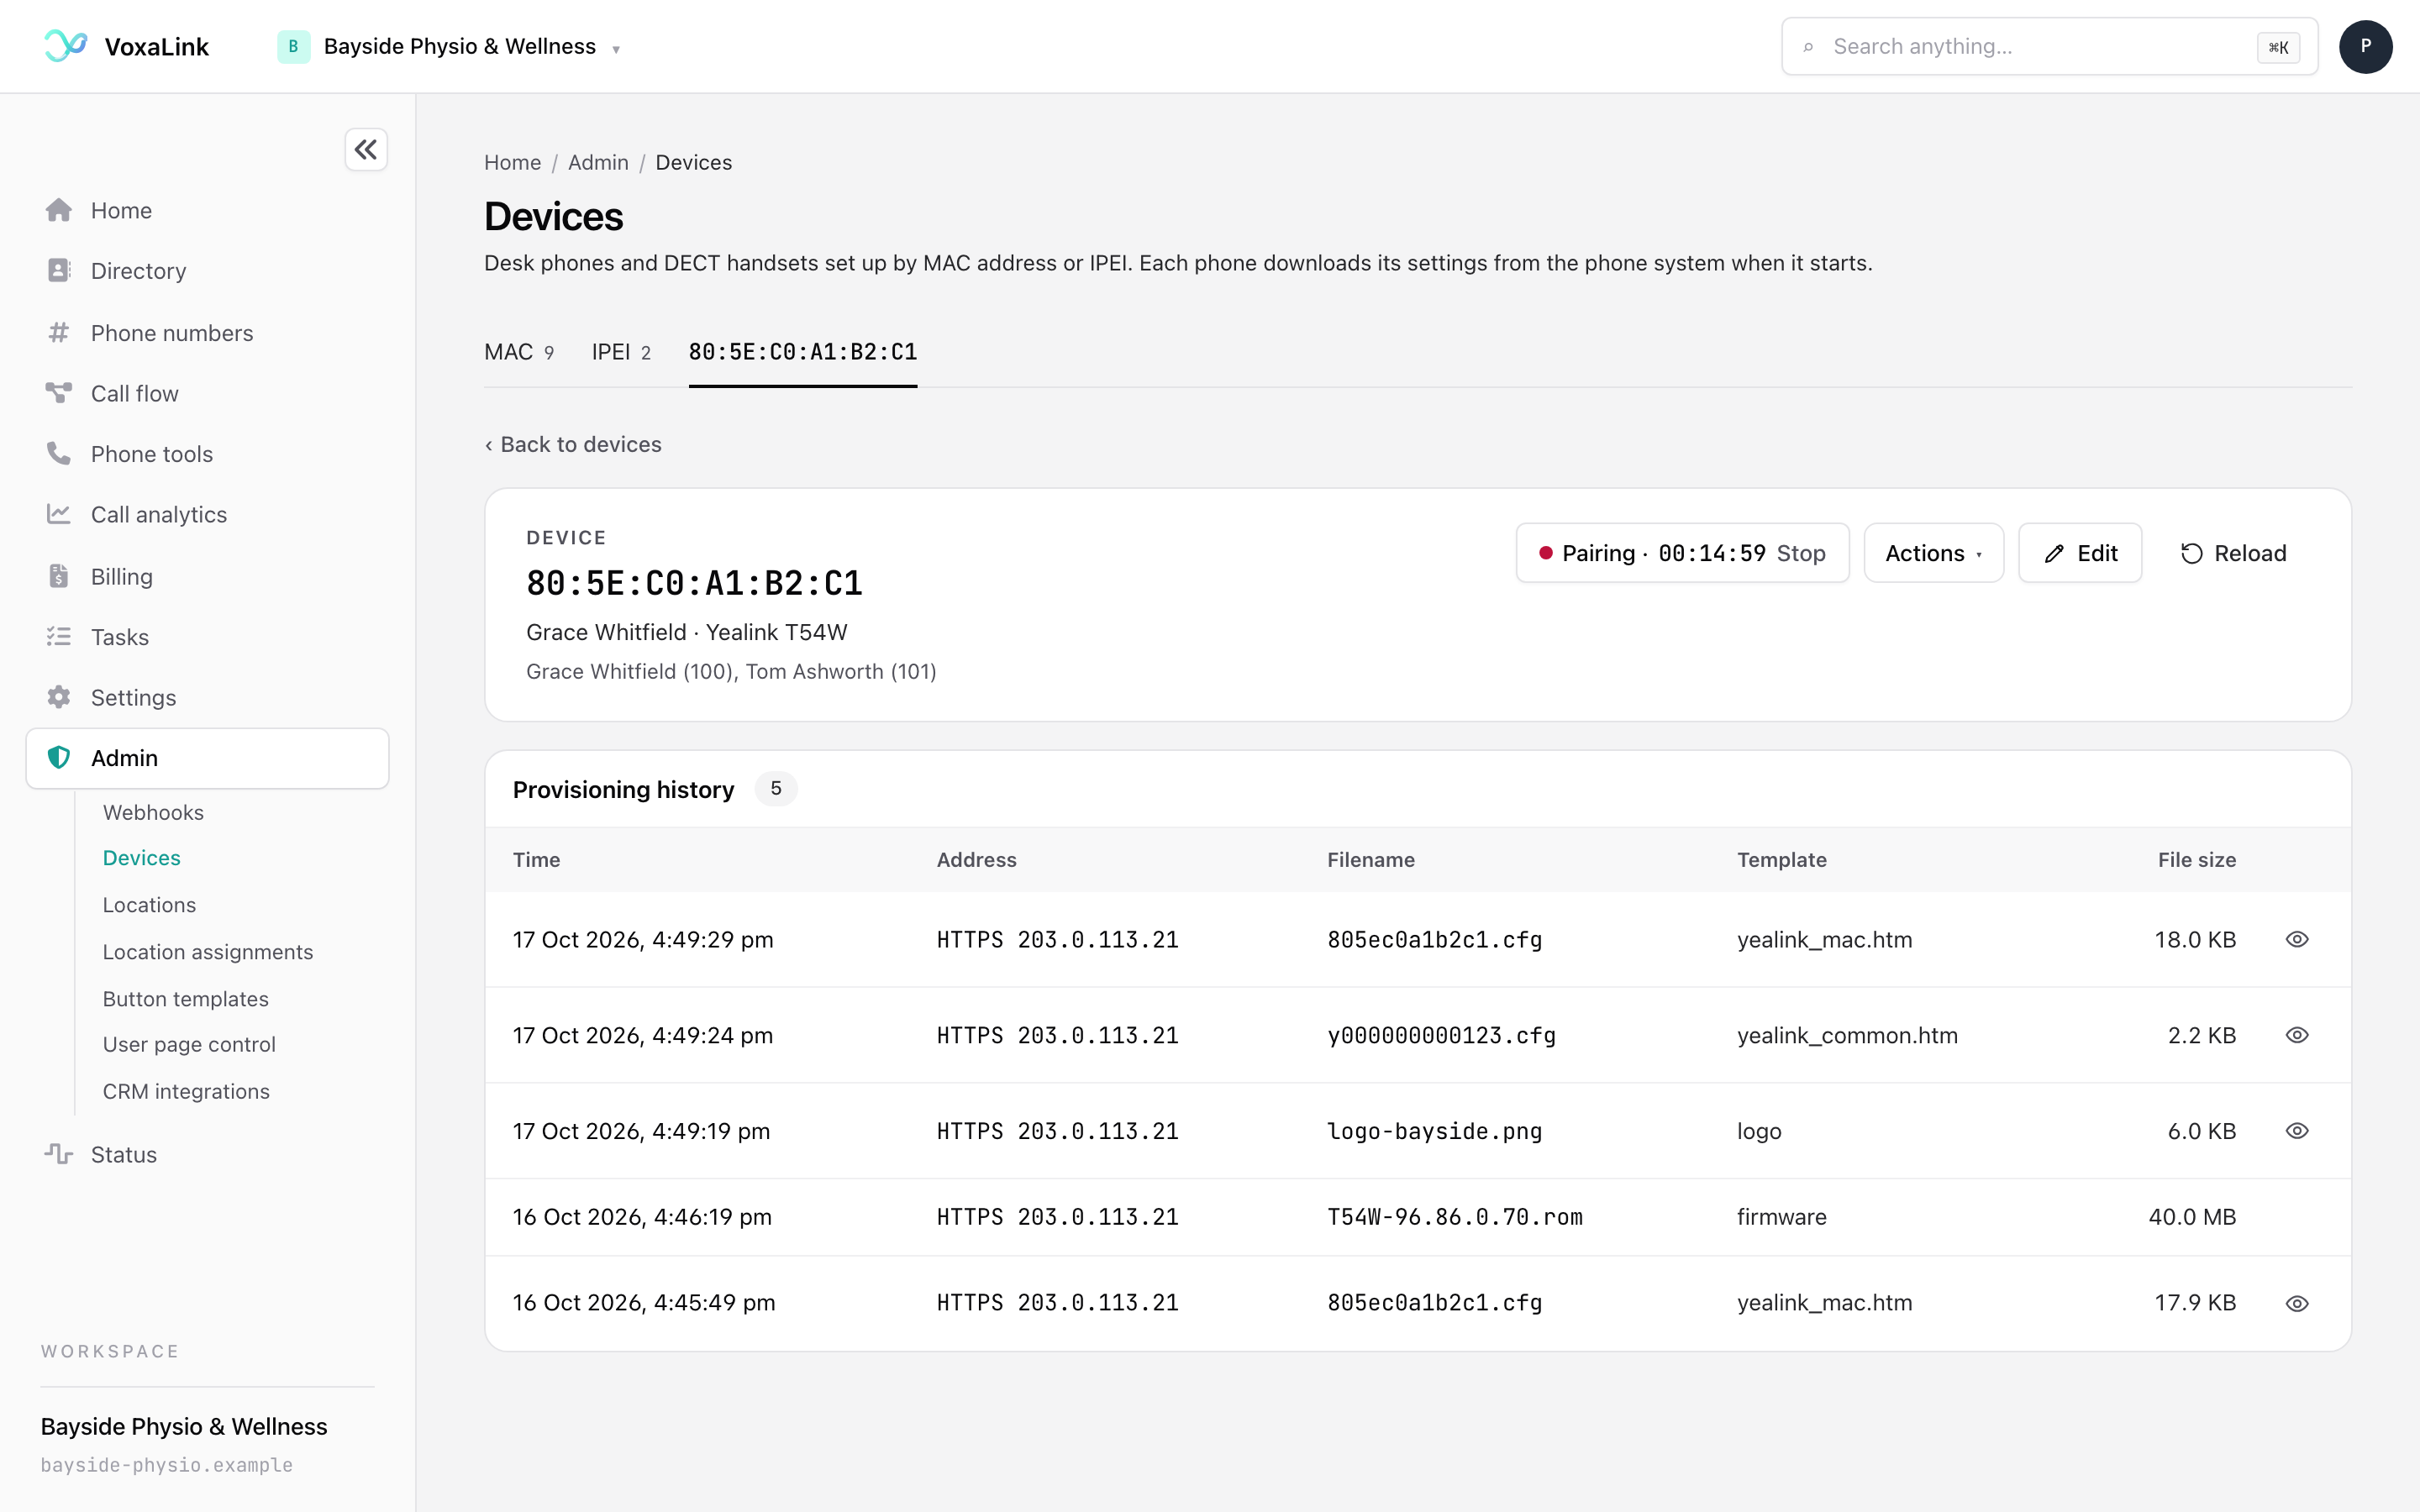
Below that, Provisioning history lists each time the phone downloaded something:
- Time: when it happened.
- Address: how the phone connected and where from.
- Filename: the file it downloaded.
- Template: the template used for that file, if any.
- File size: how large the file was.
Click the eye icon at the end of a row to read the file. Some files are not readable, and those rows have no eye. If the table is empty, the phone has not downloaded anything yet. Plug it in, or use Trigger provisioning.
DECT handsets (IPEI tab)
DECT handsets are cordless phones that connect through a base station. The base station itself is on the MAC tab. Each handset is on the IPEI tab.
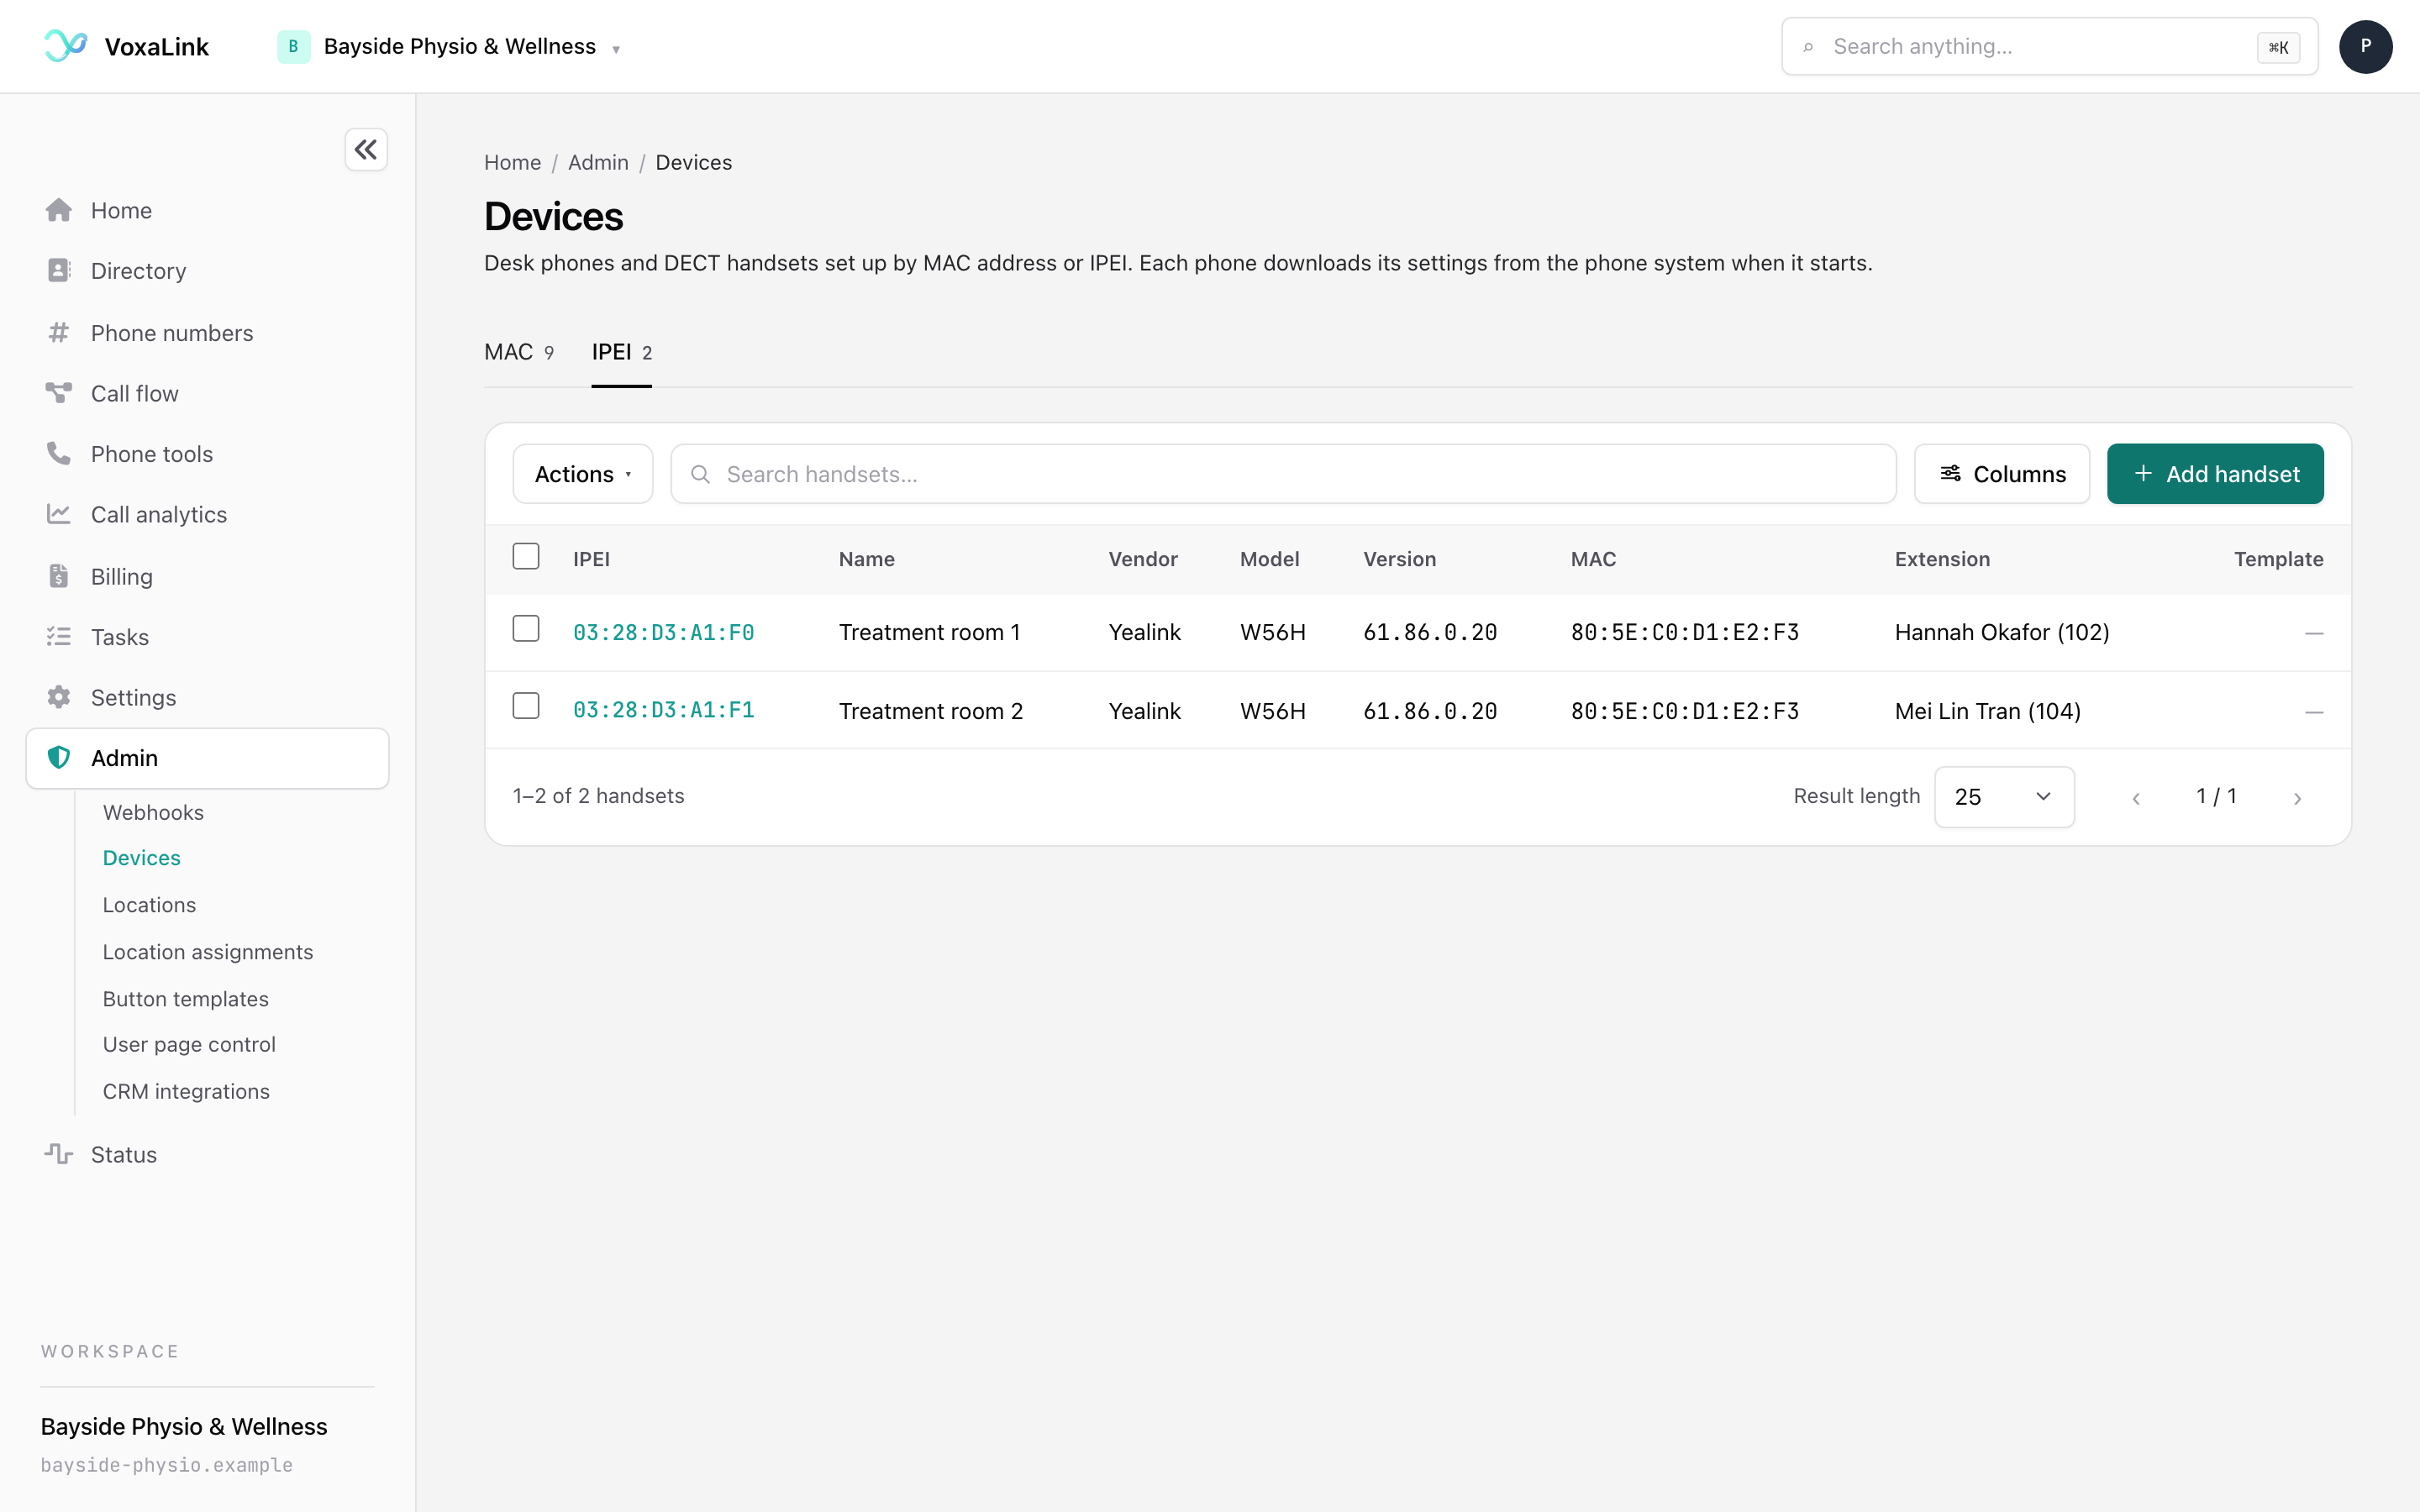
The IPEI list works like the MAC list, with Actions, search, Columns and paging. In Actions, Edit works on one handset at a time. Click a handset's IPEI to edit it.
To add a handset, click Add handset. Fill in:
- Name.
- IPEI: the handset's 10-character ID.
- Base station MAC address: the base it connects through. If the box is empty, add the base station on the MAC tab first.
- Extension: who the handset belongs to.
- Vendor, then Model. The Model box appears once you choose a vendor.
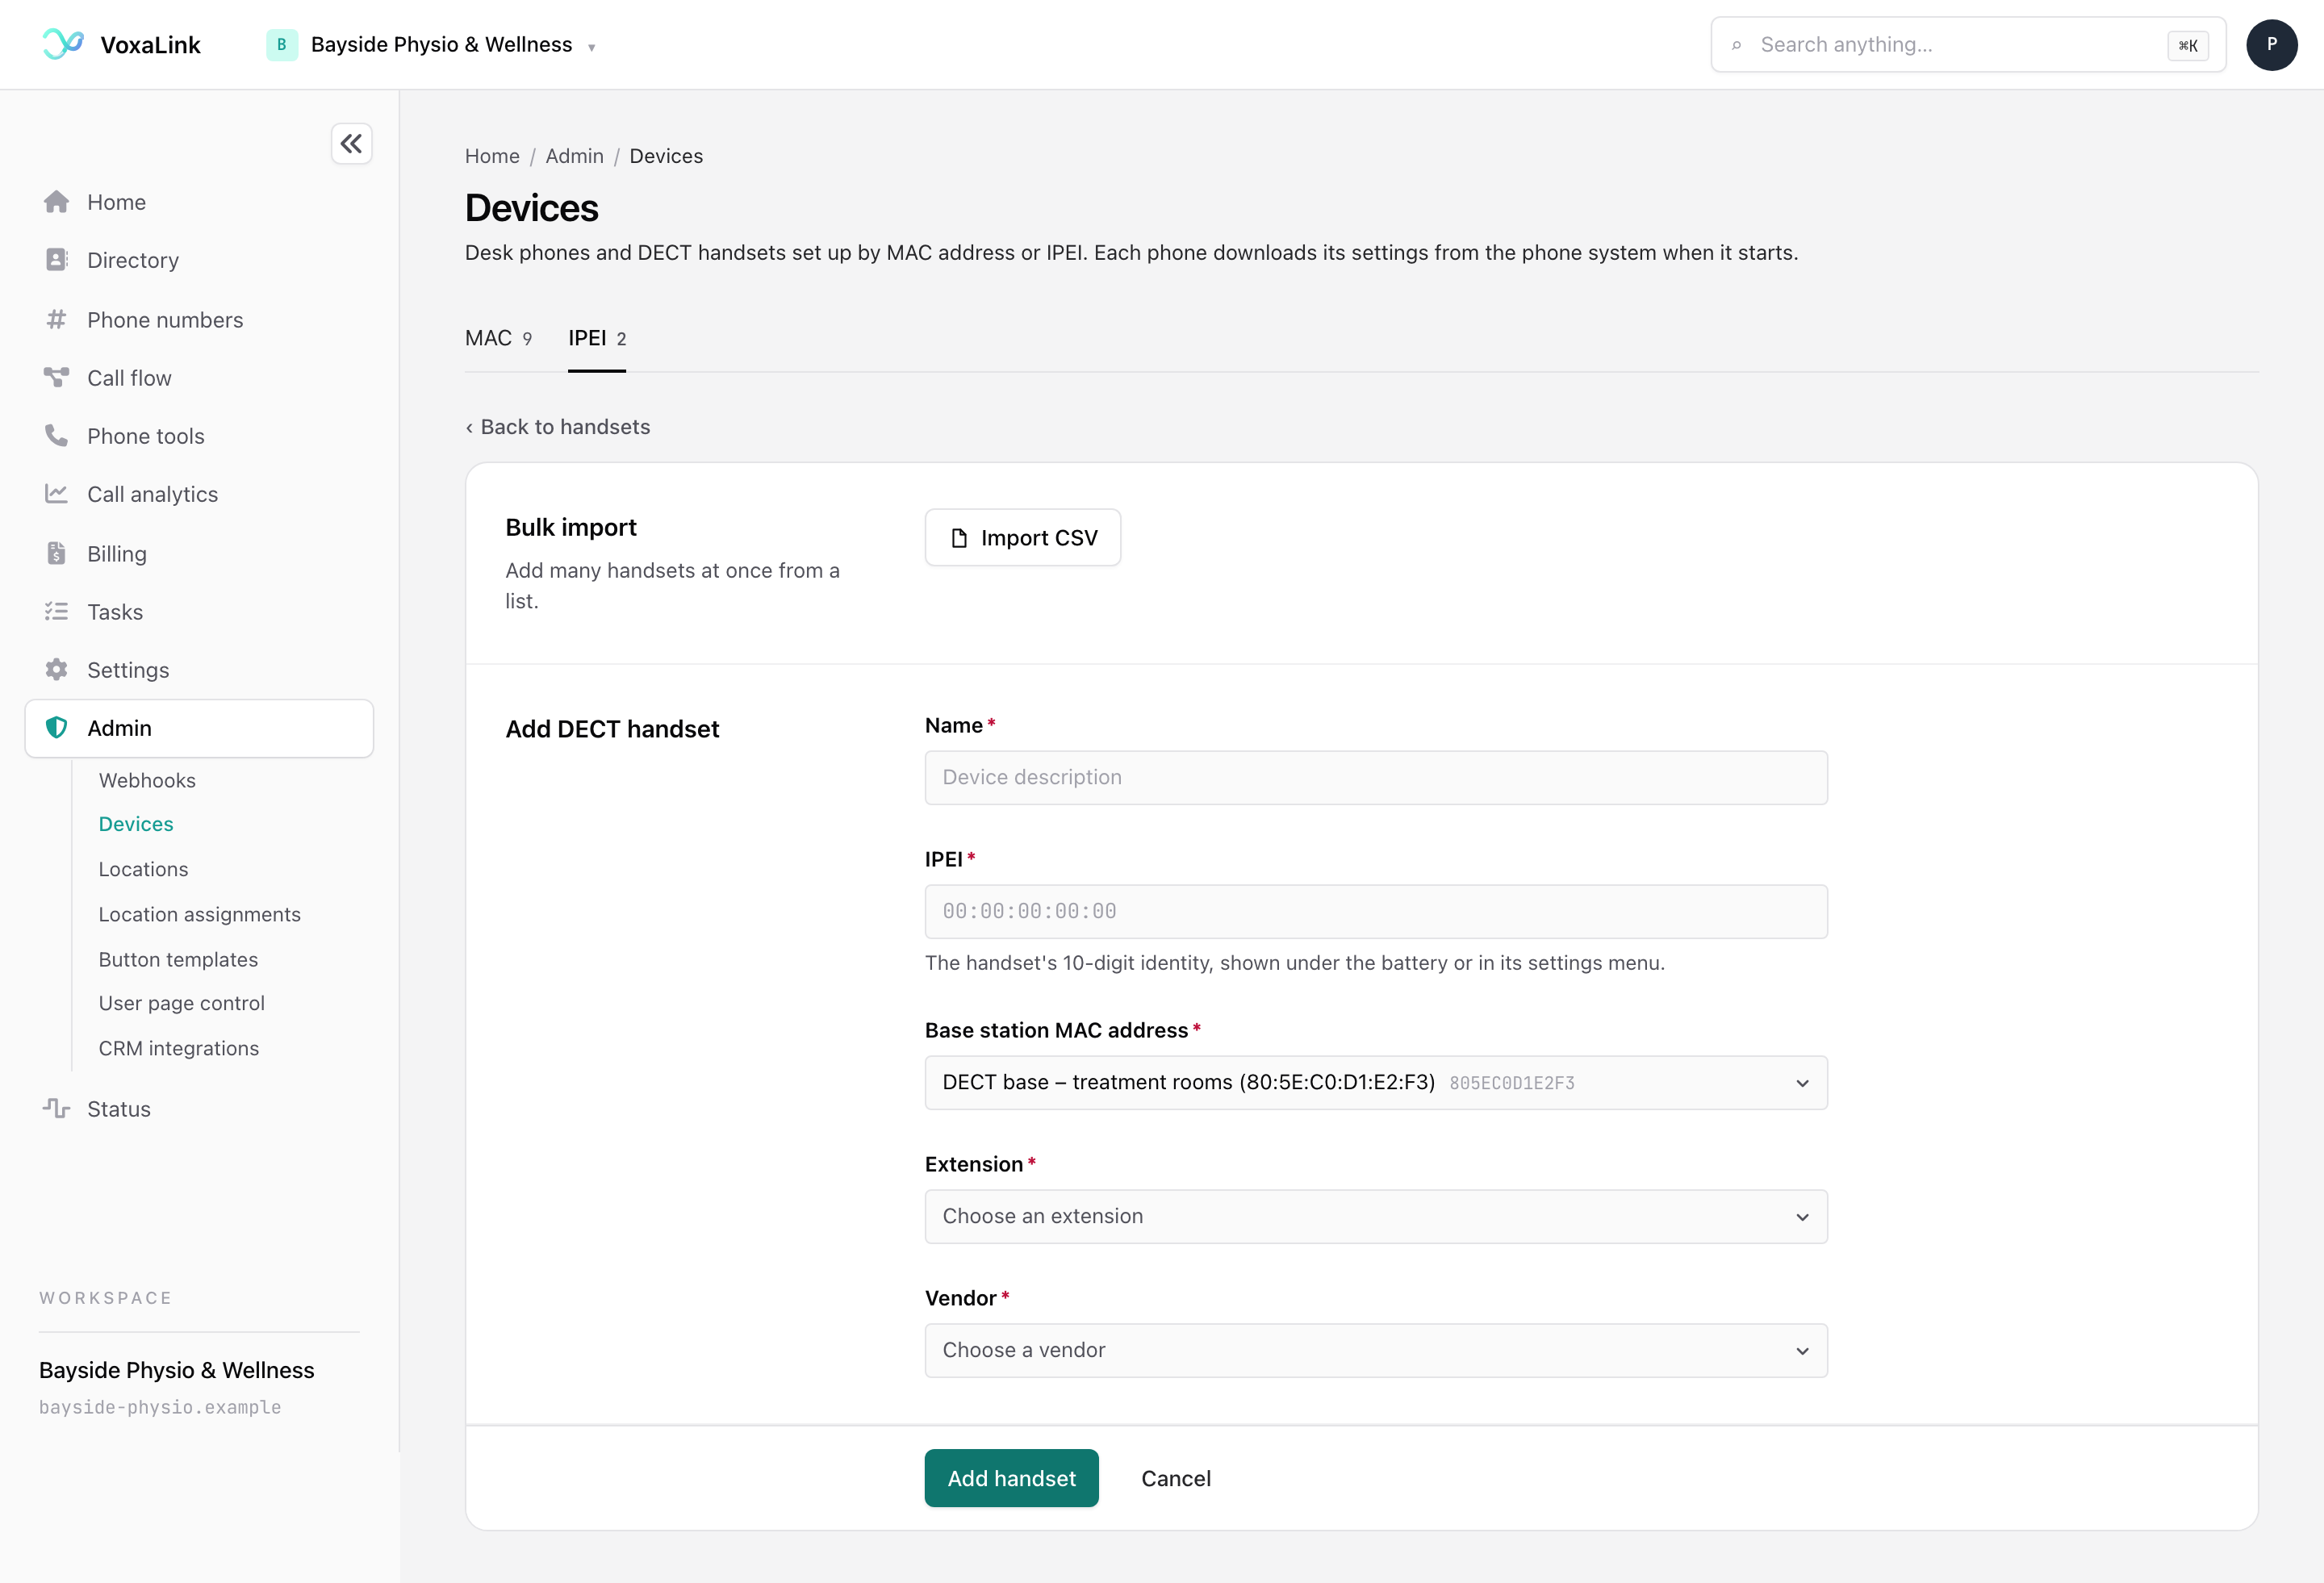
If the IPEI is already on your system, IPEI already exists lets you replace its settings or cancel.
To add many handsets, use Import CSV on the same page. The columns are:
IPEI;Base station MAC address;Extension;Name;Vendor;Model
Everyday tasks
- Add a desk phone → Devices, Add device. See Add a desk phone.
- Move a phone to another person → tick it, Actions, Edit, then change the extension in slot 1 and save.
- Add many phones → Add device, Import CSV. See Import a list from CSV.
- Check a phone picked up its settings → click its MAC address and look at Provisioning history.
- Restart a phone → open its tab, Actions, Trigger reboot.
- Pair a new phone → open its tab, Actions, Start pairing, then power the phone on.
Next: Status, the live view of what the system is doing right now.